Paneled Walls Aren’t A Death Sentence


Paneled walls.  I’m not sure there’s anyone who would willingly put these up in their home in the 21st century.  And any time I come across them, my first instinct is to RIP.  THEM.  DOWN.  But I’ve watched enough HGTV to know: you never know what’s behind those walls.  And without a Mike Holmes on my side to clean up any reno job gone wrong, this DIYer has to find an alternative.

Such was the case when Jefe proposed the idea of redoing the guest room and office at his parents place.  He got the idea after we painted an accent wall in our own office at our last apartment.  We had a bucket of blue paint left over, his parents place needed some sprucing, so why not use what you’ve got?  Well it turned out we and his parents loved the idea of redoing their 2 rooms, but thanks to our very hasty move last August, we no longer had the blue paint.  And after having some time to reflect on it, that particular shade of blue was definitely a little too bright for our of our liking.

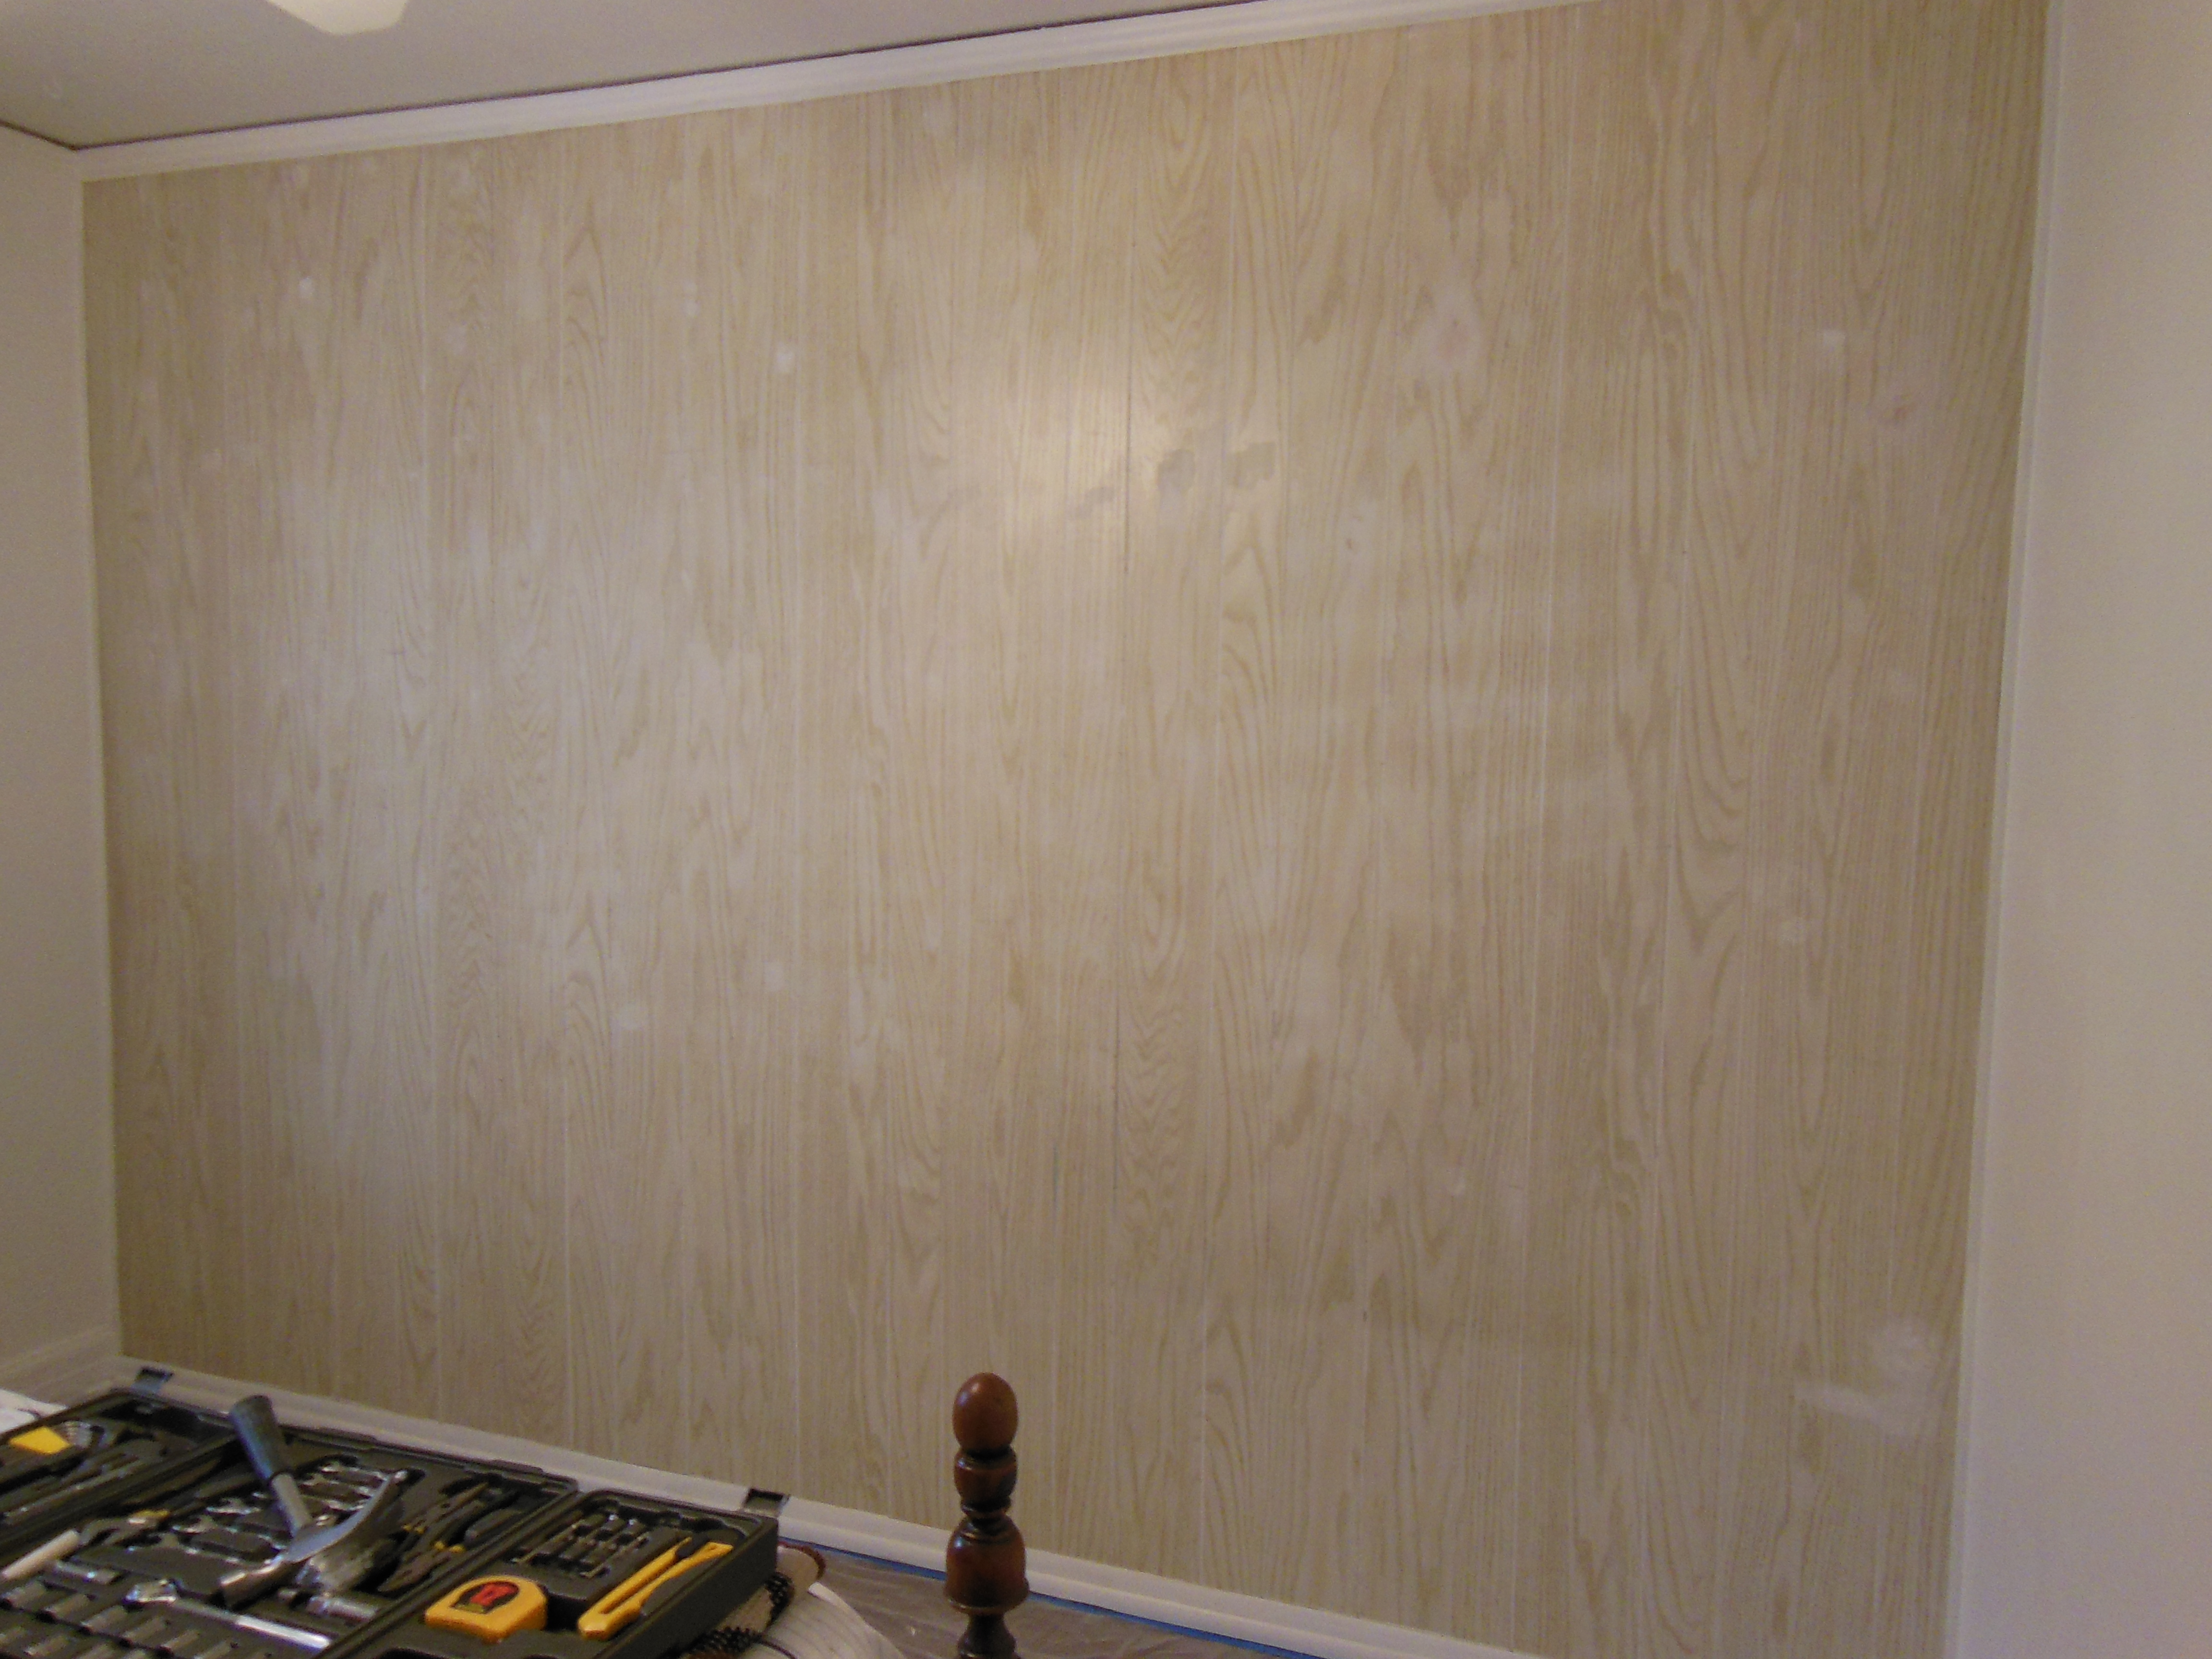
Here’s what we had to work with:

(The office, aka - Jefe's old room)

(The office, aka – Jefe’s old room)

DSCN0732

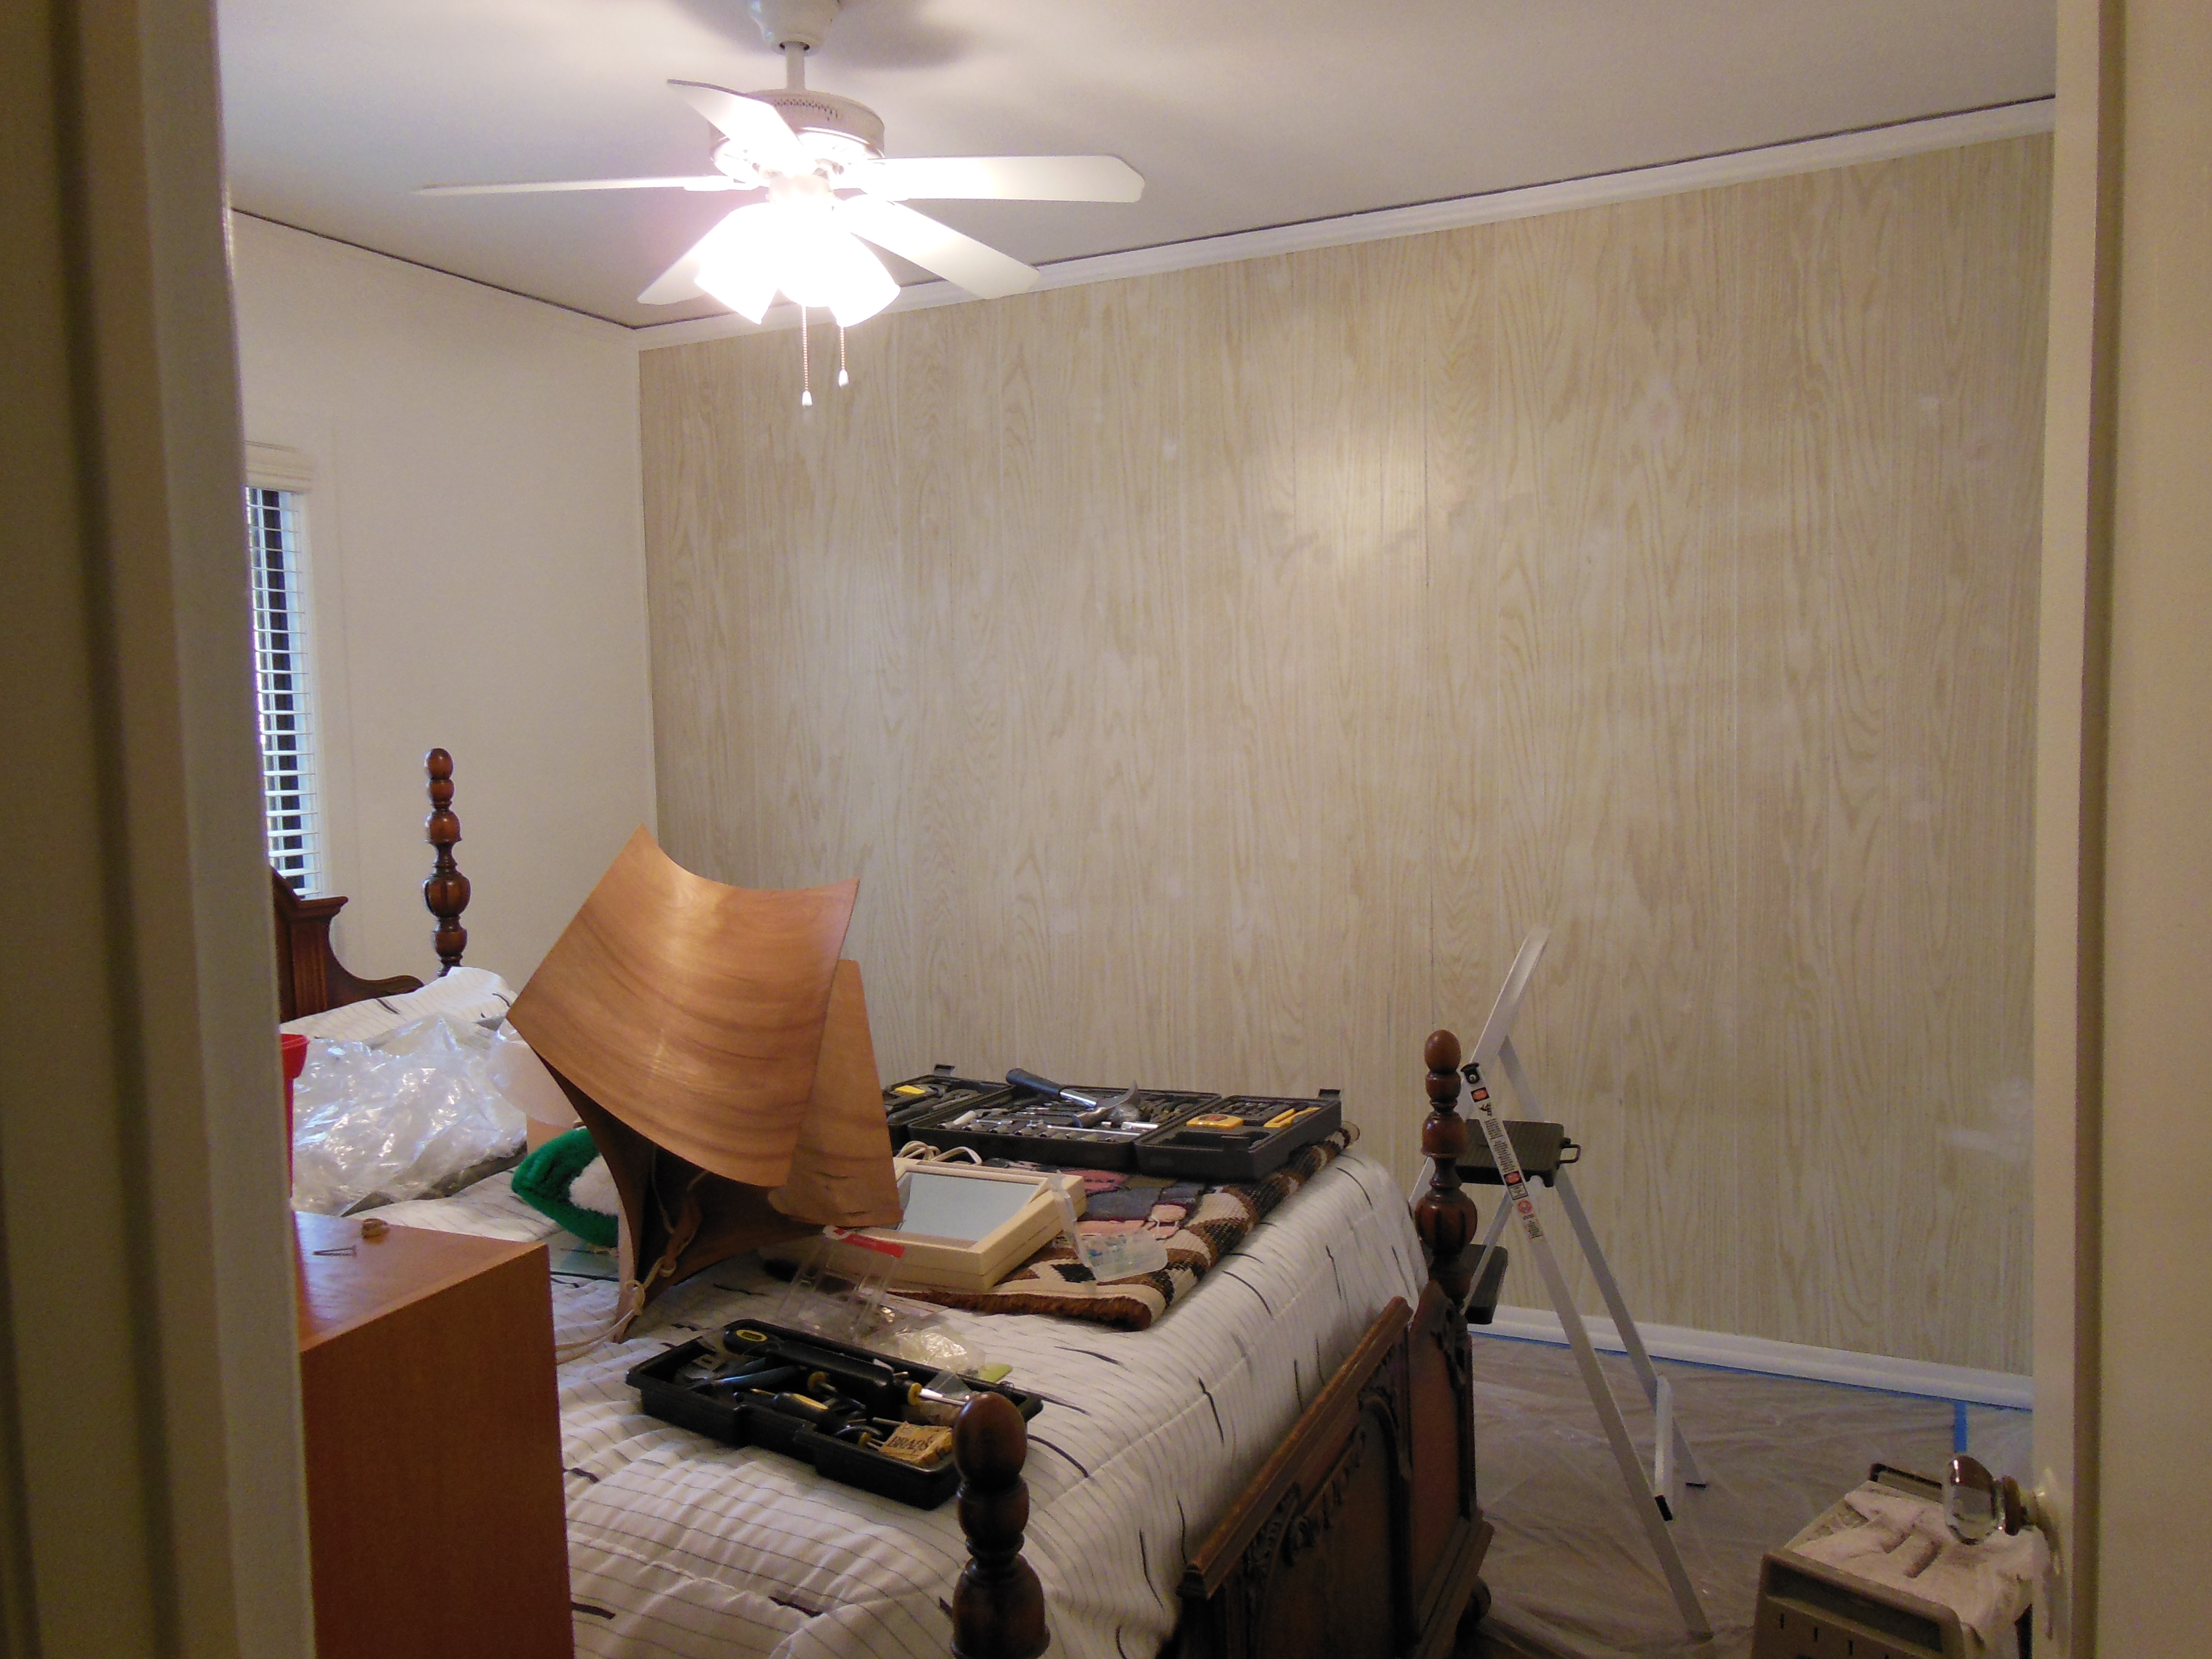
(The guest room – aka Jefe’s brother’s room)

So a few weeks ago, after we all ventured to Ikea to check out the furniture I had picked out for their new office, Jefe and I took his parents to Home Depot to pick out the new paint colors.  His parents were having a few of the rooms repainted so I thought that with each room having a single paneled wall that they would be best turned in to accent walls with some color and the rest of the room done in Behr’s Decorator White.  For the office, we chose a similar but slightly more muted shade of blue as our own former office.  We chose a similar color for the guest room, but in the minty green family.

Martha Stewart Salt Water

Martha Stewart Salt Water

MS-Lemon-Grass

Martha Stewart Lemon Grass

But here was the challenge – like most professional designers – you have to cater to your clients.  In this case, Jefe’s mom Gloria.  She had a few items that she wanted to integrate in to the design of the guest bedroom, namely a traditional woven rug from her native Ecuador.  The rug was tan with shades of cream, burnt orange and gray.  Needless to say, my minty green paint swatch was quickly pitched in the garbage.

DSCN0624

As an alternative, we choose a light tan with grey undertones (Martha Stewart’s Potters Clay) that coordinated nicely with the rug that will hang on the accent wall and will act as a neutral for the rest of the room.  And I have to admit that as much as I loved that green, it would not have gone with their current bedroom furniture (at least the stuff that we’re keeping).

Martha Stewart's Potters Clay

Martha Stewart Potters Clay

But now the trick is going to be finding those pops of color to really bring the room to life and give it some excitement.  I’m hoping to have a full design board for this room for all of you soon!

So after Gloria & Harry headed east for a trip to visit Jefe’s brother and family, we headed to their house for a weekend of painting.  Step 1, the prep work, was probably the hardest.  Those paneled walls had seen better days.

DSCN0753

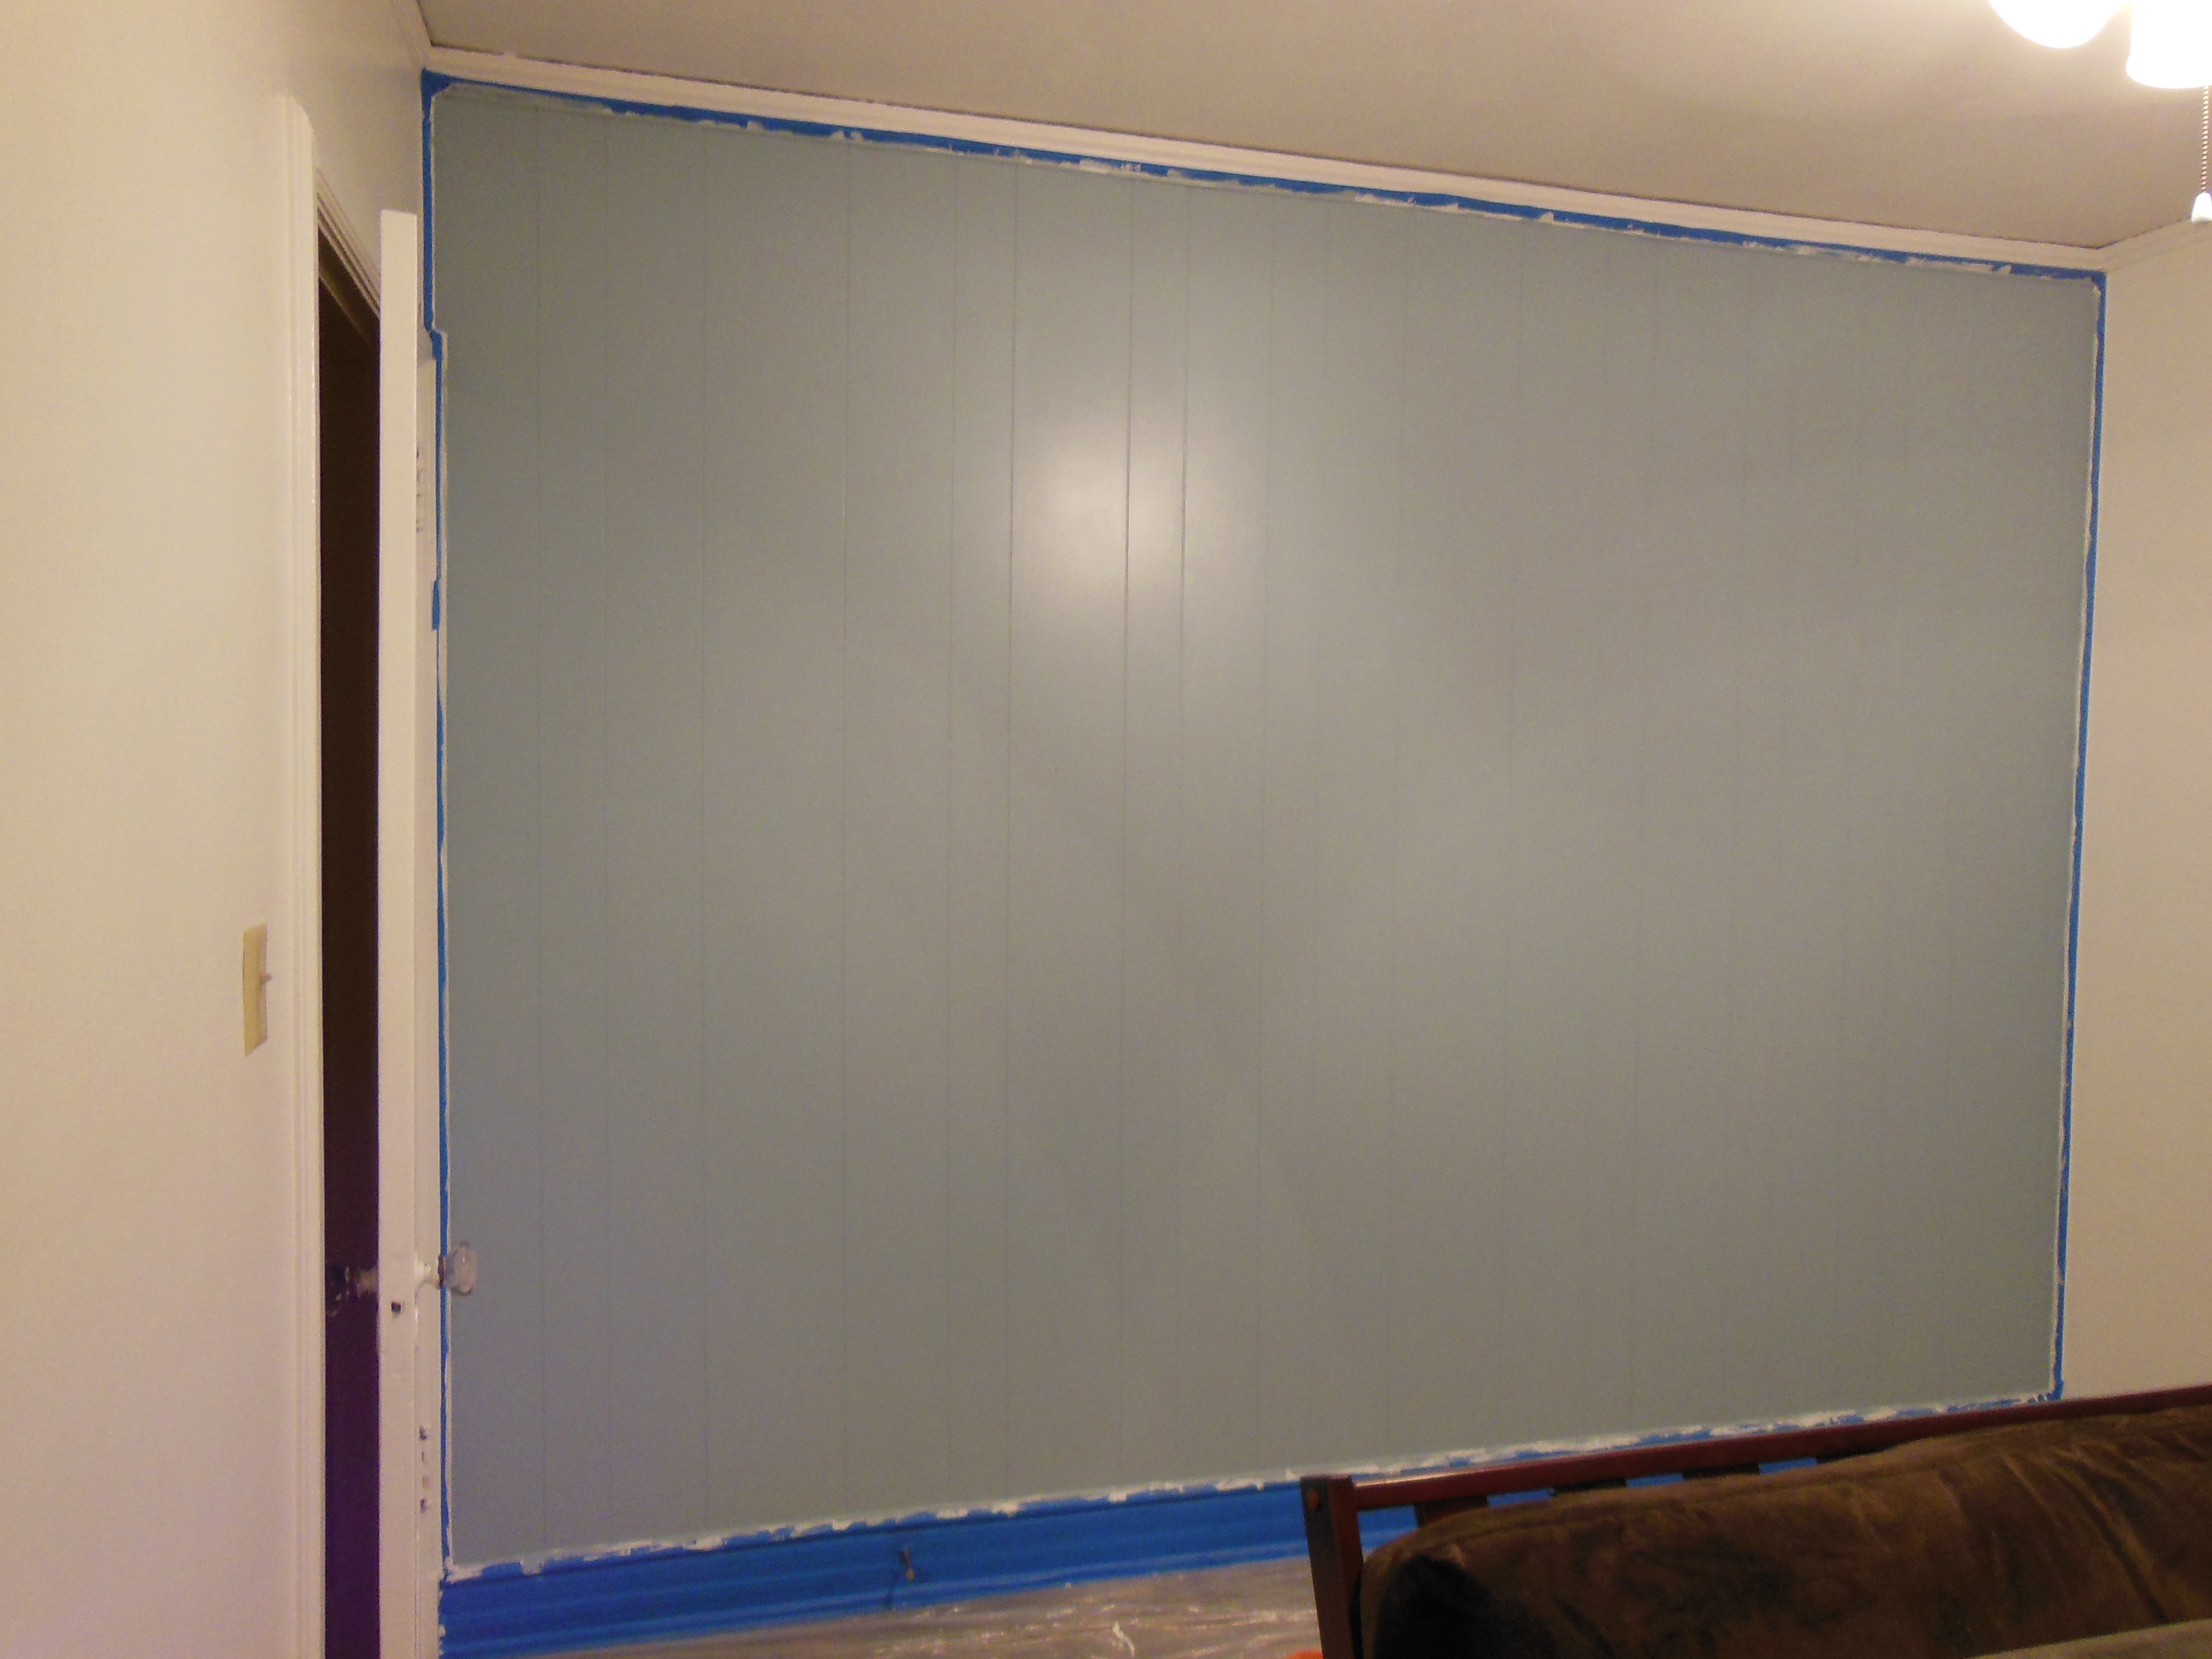
So for the next 3 hours I sanded, patched holes, pulled down ancient pieces of Scotch tape and sanded again (Jefe was clearly a fan of taping up his Red Sox posters).  I also gave the walls a good wipe down more than once particularly after noticing patches of crayon in the grooves of the paneling….  Here is the finished patched but pre-painted version of the guest room:

DSCN0756

But back to the painting.  After years of reading the blogs of fellow DIYers, I knew the paneling was going to present some challenges.  As paneling is not like drywall which sucks up paint like a sponge, it can be slick.  And most paneled walls, particularly if it’s real wood, have stain, and/or some sort of protective coating over it.  Both of which make it even slicker and hard for paint to adhere to.  Both can also bleed through primer and paint, leaving weird stain marks like a napkin after a dinner of greasy NY pizza.

So getting the right paint and particularly the right primer was key.  Enter ZINSSER stage left.

DSCN0758

I knew if fellow bloggers had used it to success when painting veneered furniture and it was a similar type to what Young House Love used on their own paneled walls, I had faith this would do the trick.  Well, 3 coats later, I was still skeptical.  The guest room’s paneling was older and more like a real wood.  And much much lighter in color so that appeared to be fine.  But the office, however, was a slick veneer with VERY dark stain in the grooves.  After 3 coats of primer, the stain, although much lighter, was still seeping through and yellowing the pristine white we just spent hours getting on the walls.

DSCN0786

So with a hope and a prayer (and less and less daylight), Jefe and I cracked open the paint cans.  Because I’m a paranoid DIYer and have had strokes of bad luck my whole life (my name literally means ill-0mened, I kid you not), I decided I couldn’t be cautious enough.  It cost about $10 per gallon more, but I chose to go with Behr’s Premium Plus Interior Stain-Blocker Paint & Primer.  I figured that if the Zinsser and the stain-blocking paint with primer couldn’t do the job, nothing could (short of ripping down the paneling entirely which you now know was not really an option, particularly for a two day weekend-ony project).  So we slapped the first coat of color on both walls and called it a night.

DSCN0802

(Gotta love a man with a baseball hat and jeans on with a paint roller in his hand…)

I also discovered that it was best for me to go over ALL the grooves first to really get the paint in there as the foam roller didn’t quite cover it:

DSCN0813

We came back the next day and much to our surprise, our hard work of the day before had clearly paid off.  Not only did the paint stick to the walls like a champ, but they looked as smooth as a baby’s bottom thanks to my extensive prep work and the stain had NOT leaked through.  I was ecstatic.

DSCN0817

DSCN0821

(Ignore Jefe touching up the corner and the tissue box.  Painting with a sinus infection is NO fun)

So we put another coat on and called it a night as Jefe had a plane to catch the next morning at 6am.  The paint was still VERY wet and it was so late we decided to forgo pulling the painters tape from the edges.  I came back later in the week to do that.  This is where my excitement was dulled by peeling paint…

The walls’ edges for the most part looked really good.  I took my time pulling it down, using an Exacto knife to get it straight where it needed to be.  And I had always heard that you should pull the tape when the paint is wet, but I was just so afraid of messing it up, as I have been every other time I have painted.

DSCN0859

DSCN0870

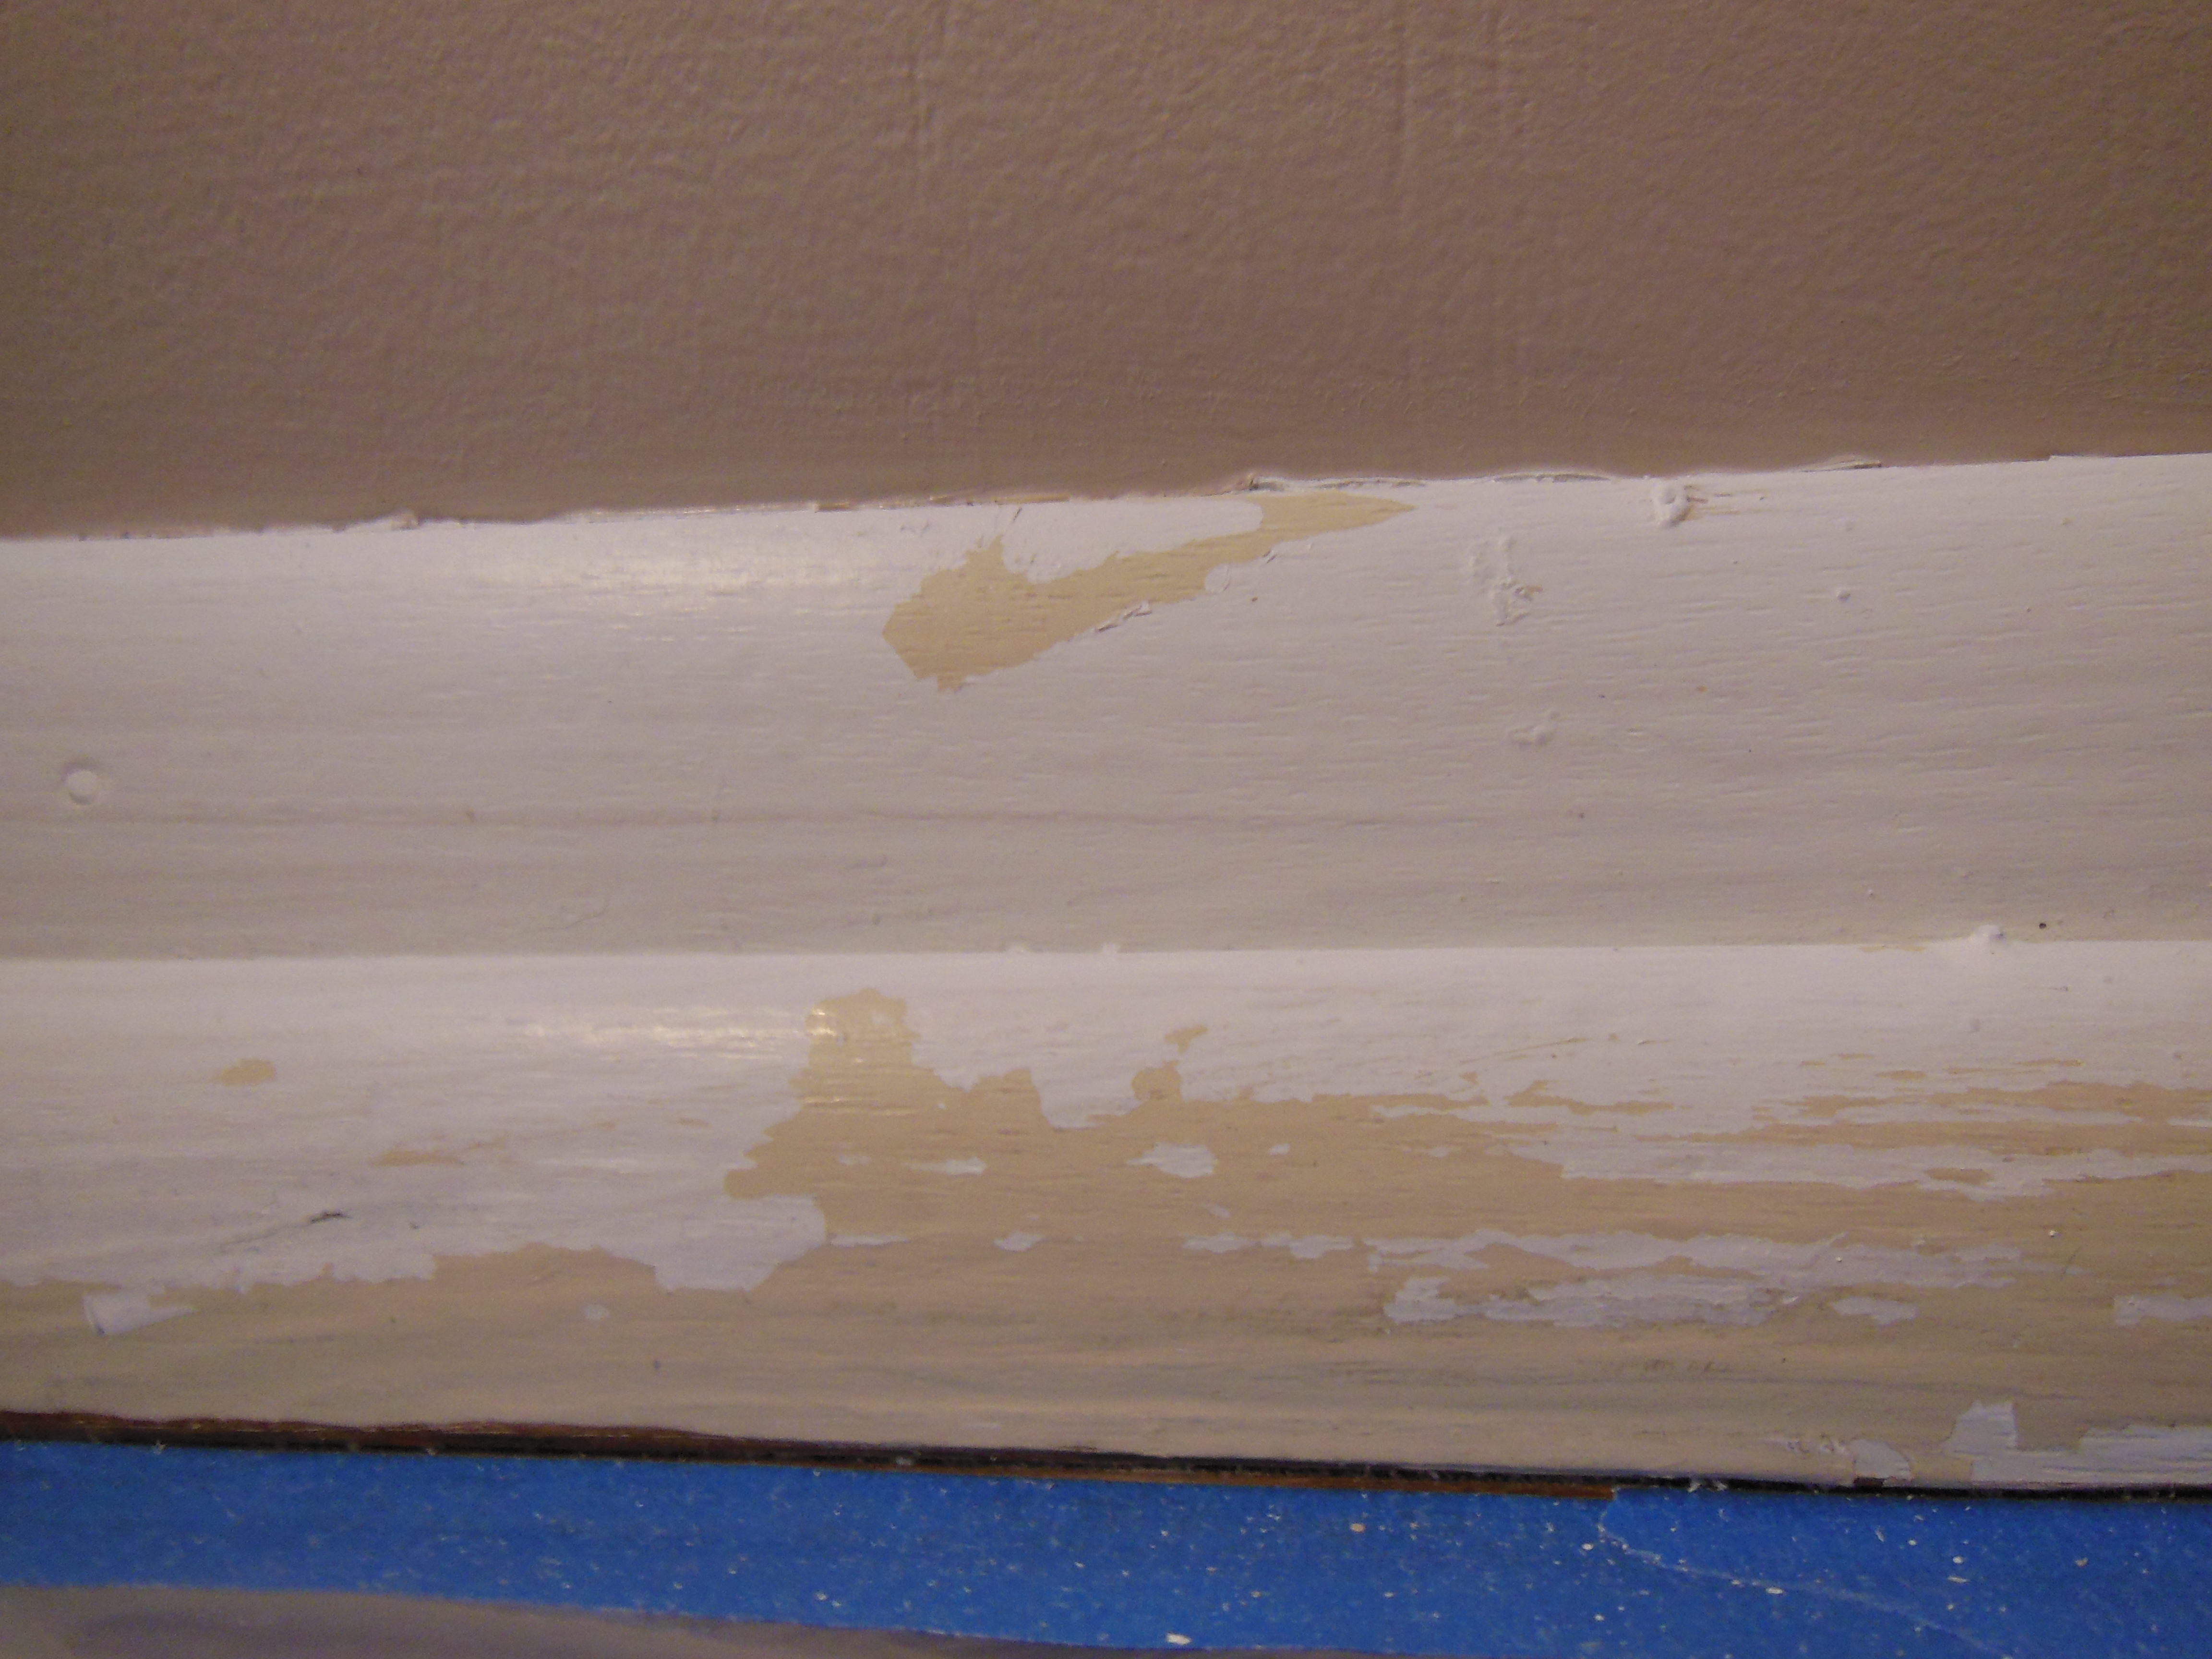
Well, needless to say, the trim under the painters tape had seen better days once I pulled it off.  Gloria & Harry just had the rest of the rooms, including the trim on our accent walls, redone.  Now I knew the white paint was probably not fully cured when we put the tape down; the trim had only been done a week before so I had anticipated that there would be some peeling.  While I was prepared to touch up what was needed, we also discovered that the guy on the painter’s crew who did the trim had only done one coat, not two.  To top it off, he had also mistakenly used the satin wall paint, not the semi-gloss they used for the rest of the trim in the room.

So I busted out my sanding block, smoothed it down, and then broke out the Zinsser again.  I was afraid that  the areas missing larger chunks of paint would be visible under 2 coats of semi-gloss.  So I primed the heck out of those puppies.  One thick coat of primer and one coat of semi-gloss later and we had ourselves some beautiful baseboards.

DSCN0876

DSCN0880

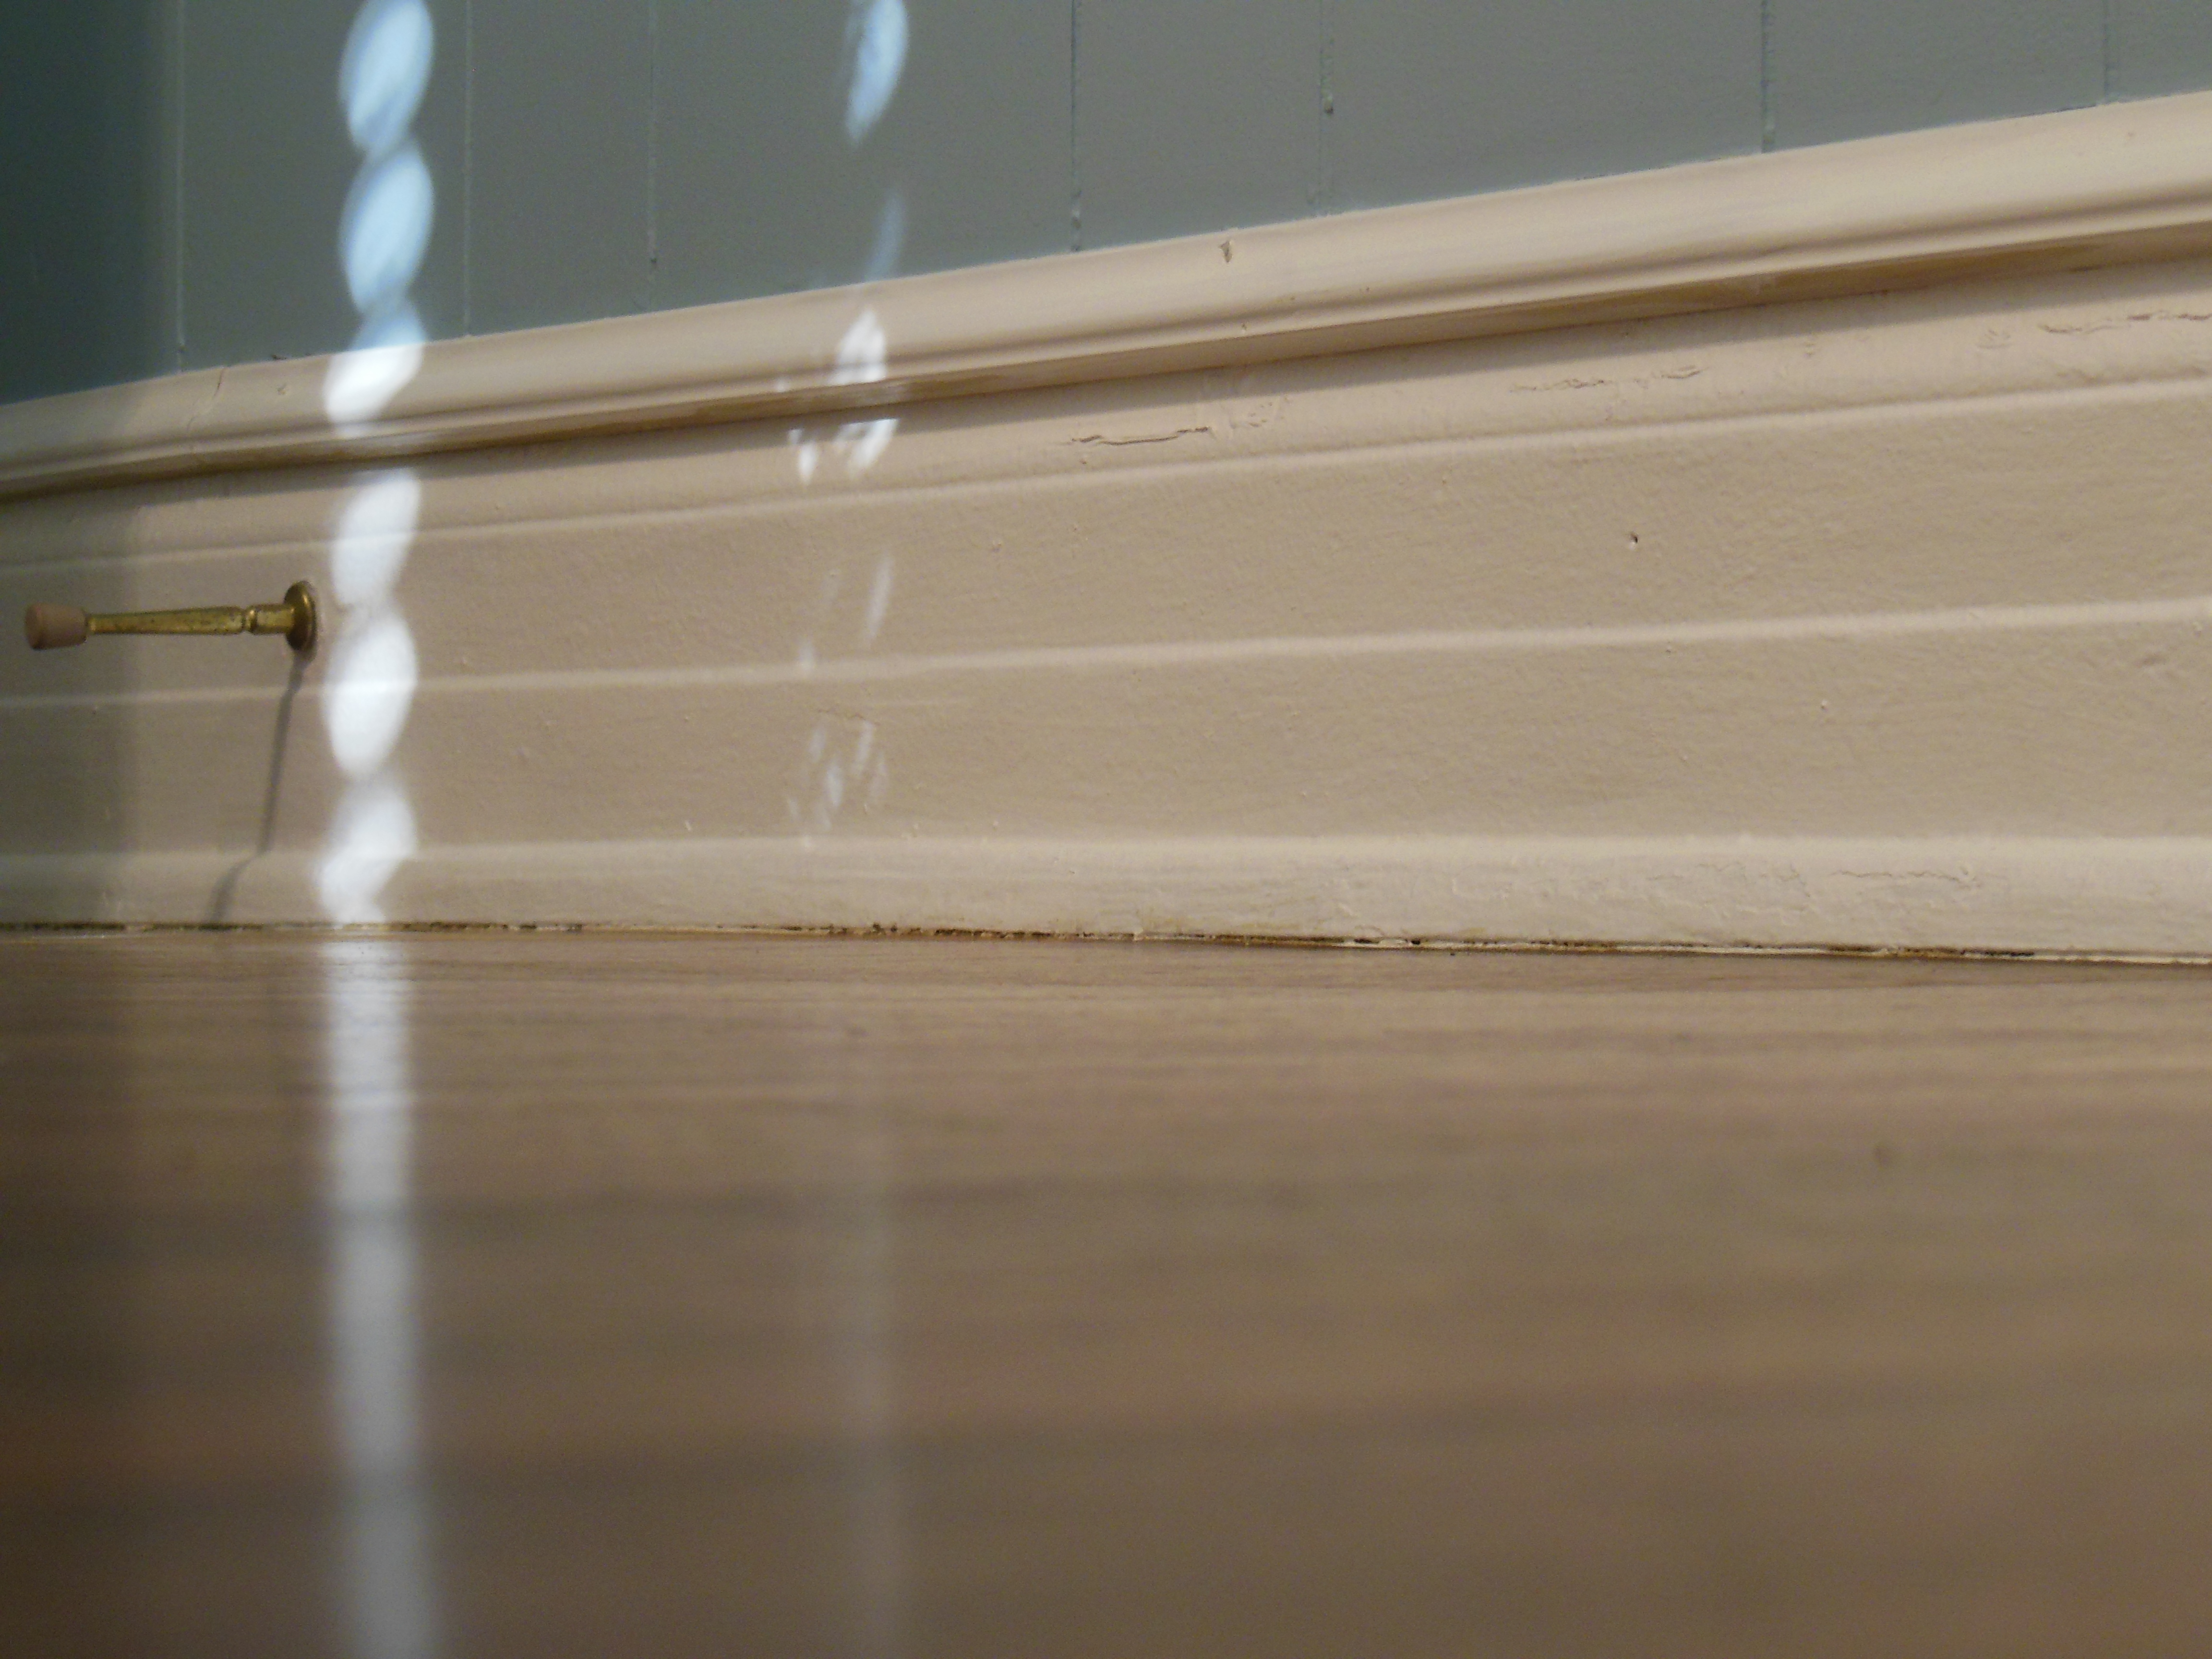
And this time, I decided to suck it and try to pull the painters tape while it was still wet.  OMG WHY DID I WAIT SO LONG TO TRY THIS?!  My lines were perfect!  No need for an Exacto knife, no worries about pulling off thick chunks of paint creating an uneven edge.

It was like a light bulb had finally been turned on.  I, Mallory, will never again wait for paint to dry to pull up the tape.  It truly does make a world of difference.  I guess I just had to see it for myself.

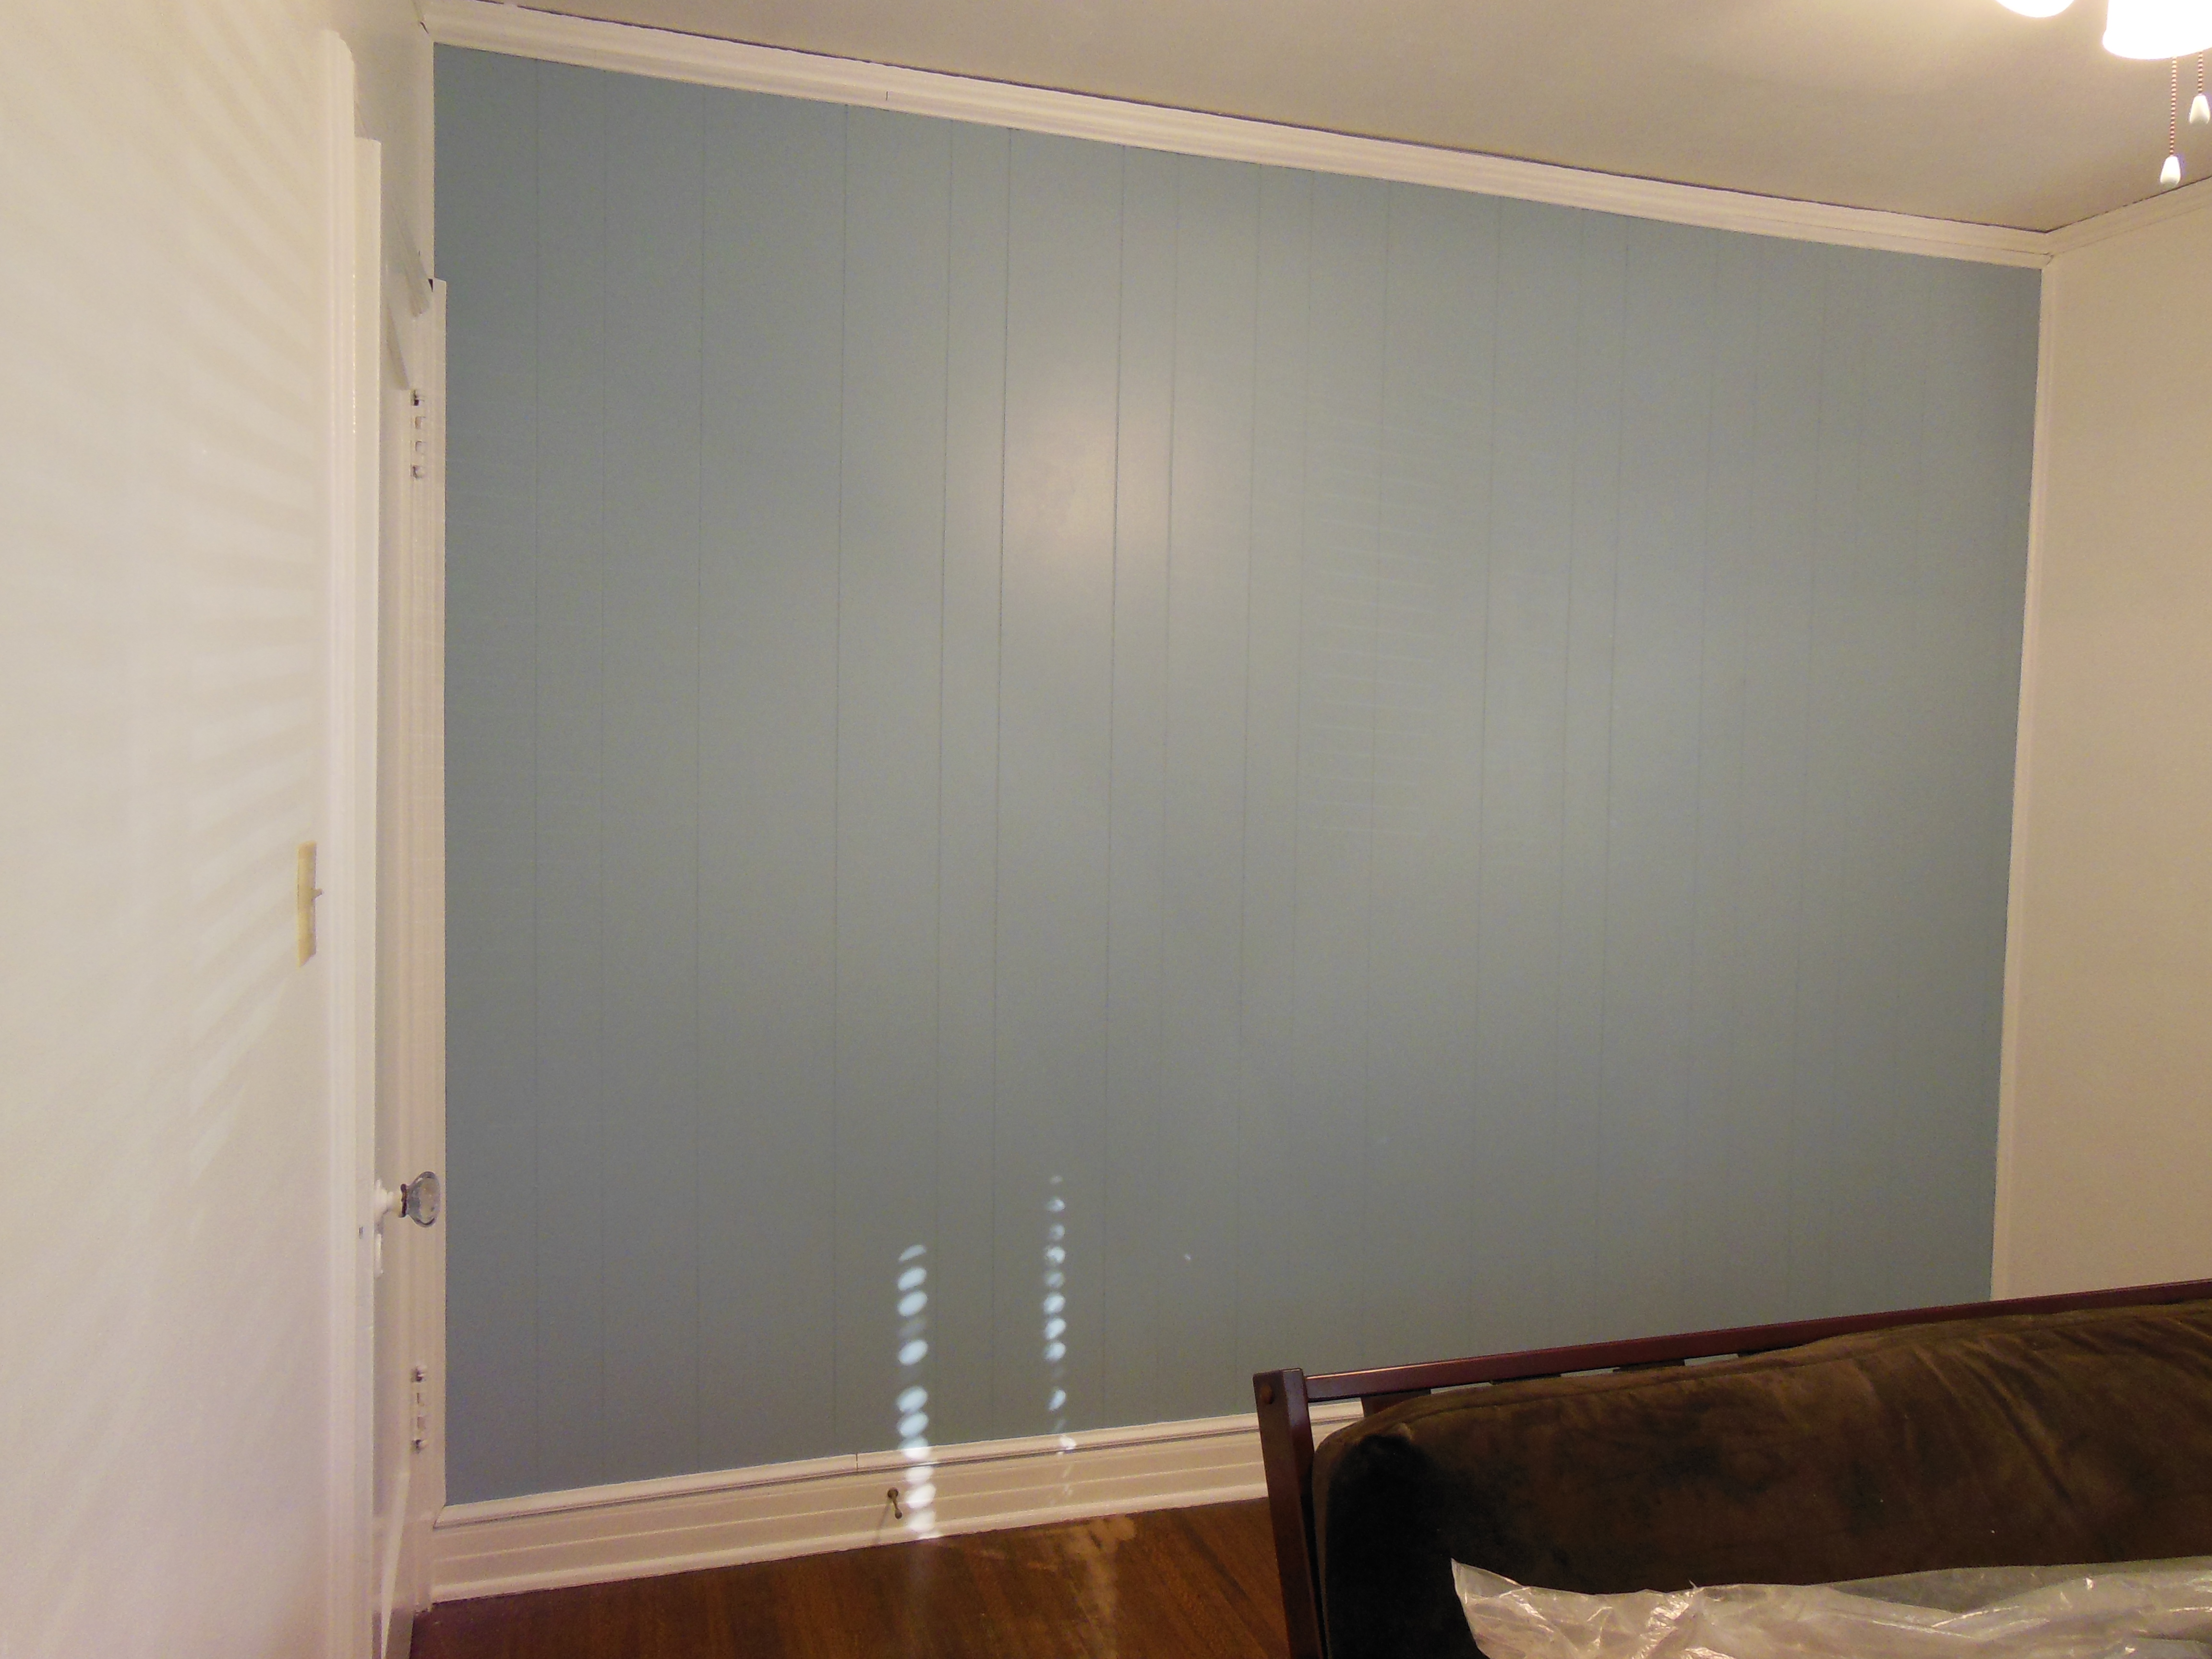
So there you have it: two fully painted rooms.  The combination of the Behr Decorator White along with the colored accent walls is a vast improvement.  The rooms automatically feel fresh and clean.  They are small spaces and the white really brightens things up.

DSCN0873

DSCN0882

Later this week I’ll post the first update with some furniture!  Jefe and I ventured to Ikea this weekend to finally purchase what we are using for the office.  And can I just say: Jefe and I are Ikea masters.  We can put together a Besta with optional leg extensions in under 30 minutes.  Team Sledge/Jefe for the win (someone help me find a better combo name.  We’re no Brangelina, but we owe it to ourselves to have a better team name….)

Sledge Discovers the 21st Century

So I’m trying to up my design technology know how.  Before our last trip to Ikea with Jefe’s parents to check out my furniture choices for their office, I decided to play around with a room planning app.  I had heard great things about Google’s SketchUp, but time was limited so I went the easier app route with RoomPlanner.

The app, particularly the free version, definitely has some limitations.  But it is a great basic tool in terms of showing room layout.  After a few quick hours messing around on it, I showed my rudimentary mock-up of the office to Jefe and his parents so they were finally able to visual some of the crazy ideas I had.

Now that I’ve had a smidge more time to play with it, I thought I’d show you all where this office is headed.

gloria & harry office - 3D

Some things to note:

  • The bookshelf in front of the window is meant to be a halfsie.  I still have yet to figure out how to change height for objects.
  • The bookshelf between the 2 doors is also a halfsie.
  • The blue paint color is not exact but it’s close enough.

I’ve also included the updated mood board for the office space based on some modifications I made after the Ikea trip.

OB-gloria & harry office - v2

I’m pumped to spend some more time with the app and really see what it can do.  My only serious gripe so far is that from what I can tell, you can save your mock-up as a picture, but you can’t save your work so if you want to mess around with another project, you’re unable to go back to the first one and make changes.  It could be my inexperience with the app, but thus far after reading a few FAQ and RoomPlanner forums, I have not found a work-around.  You also have a limited variety of finishes for all the furniture, floors and walls.  I’ve found that it’s enough to get by, but this budding designer does love her options…

I’m hoping to find time soon to mess around with SketchUp, see what it has to offer and how it compares.  RoomPlanner is a great down and dirty tool though if you’re just looking to whip up something quick on your iPad while your resting your feet in the living room section of your local Ikea.  Now it’s off to bed before tomorrow’s big purchasing trip.

March To-Do’s

While I’m in the midst of renovating Jefe’s parents place, I’ve started to accumulate a list of future projects and a wish list of item’s for our place.  Busting out my paint clothes has really inspired me to tackle a few larger projects to really make this apartment feel like a home.  (Hopefully a nasty ear and sinus infection won’t plague me during any of these projects like it did during last weekend’s painting extravaganza…)

Although our current apartment is a vast improvement from our last place (excluding the loss of square footage), it still isn’t quite homey enough for me.  It still just feels like a cookie cutter apartment that we’re only temporarily biding our time in.  So Operation Home-ify has official begun.

First on the list was actually inspired by our recent trip to Rejuvenation.  I’ve been hiding a purchase from you all; I finally convinced Jefe to get a little chalkboard to hang above our island/bar in our dining area.

DSCN0837

But our island is really starting to stand out– it’s the ever popular Forhoja from Ikea and is made of a light-colored wood.  It’s been sort of a catch-all for our spill-over kitchen stuff, such as serving utensils, our “bar” area, grilling paraphernalia, cloth napkins, tablecloths, etc.  I’ve been meaning to upgrade the baskets for some time too, but hadn’t really been inspired/found just the right thing.  I think it was partially due to the lighter wood; there was just nothing I found that would coordinate with it.

DSCN0846

(Please excuse the boxes that we still haven’t found a place to unpack….)

But thanks to our new little chalkboard, I’ve been inspired to take the raw wood of the island and stain it to match.  It’s a darker stain with almost a hint of gray– very rustic, and much more traditional in style.  I think it will also tie in better to the rest of the black-brown furniture we have and the silver curtains of the dining room.  Not to mention that I’m just stoked to try my hand at staining again; the last time I actually stained anything was as a freshmen in college when I helped construct and stain a circular staircase for a booth in CMU’s annual spring Carnival.

And after the staining inspiration struck, on a recent trip to Target, I picked up this beauty that I’ve had my eye on for quite some time that I thought would tie the chalkboard and soon to be stained island together with the dining table and dresser.

DSCN0849

Next up on the list is the de-modernization of a few other pieces we own.  A few weeks ago when Jefe and I took his parents to Ikea to look at my furniture choices for their new office, we discovered that a new line of drawer and door fronts for the BESTA line have been added.  They’re much more traditional and definitely more up my alley than our current drawers.  Thanks to the mix and match nature of the Besta furniture, we’ll easily be able to swap out our old drawers for these new ones.  We’re hoping to accomplish that task this weekend when we venture back to finally purchase everything for his parents’ place.

DSCN0829

(our current Besta drawers)

besta-vassbo-drawer-front__0122849_PE279100_S4

(hopefully our replacement drawer fronts)

In addition to the drawer fronts, another easy fix I’m planning is to add new drawer pulls for Jefe’s dresser.  Due to the lack of space in our bedroom, it’s currently being used in our dining room as “credenza” of sorts.  But it’s lacking in style, particularly with the current black and dreary hardware.

DSCN0835

What I’m really hoping to find are some of these cup pulls that only require one screw to secure them instead of requiring me to drill a second hole in each drawer.  I have yet to find them, but I have not given up hope.  They will be mine.

Deco Cabinet Cup Pull

Last on the list is to find a replacement for our other DVD storage/catch-all dresser.  We picked this up when I spruced up Jefe’s studio when we started dating.  But thanks to Operation Homify, he’s graciously agreed to get rid of it if I can find an acceptable replacement.  I’ve been trolling Craigslist, World Market and the like for something cheap, solid wood, and will add a little more character to our place (and clearly isn’t off of Ikea’s best-seller list…)

DSCN0826

(Out with the old, in with the *somewhat* new… and any suggestions for what to fill these vases with while I’m at it?!  Once I took the Christmas balls out back in early January, I haven’t found anything I think works.  I’ve got the equivalent of writer’s block when it comes to these vases…. is decorator’s block a thing?!)

That’s about it for the current to-do list at chez Sledge.  Later this week I’ll have an update on the office and bedroom paint job that Jefe and I tackled last weekend.  Let me just say that the painted paneled walls makes a WORLD of difference.  I can’t wait to finish it up, accessorize and show you the final results!

Get your paint on

This weekend Jefe and I tackled a first: painting 2 very different types of paneled walls at his parents place. Details on our successes (and some near misses) coming this week!

For now, I’ll leave you with a little preview. It’s one of my favorite things to look at 😉

20130318-150825.jpg

BBQ Heaven

Last weekend Jefe and I hit the road for a much needed weekend away.  We’re big baseball fans and have been wanting to hit up Dodger spring training in Arizona for quite some time.  So after a rough couple of months at work for both of us and recent 3 year anniversary, we decided to ditch the Blackberries and get the heck out of Dodge.

Headed due east, we drove to Phoenix last Friday and took our 2013 Edge on it’s first real road trip.  During our 6 hours on the 10 freeway, we encountered (albeit from the safety of our heated leather seats) snow capped mountains, some infamous dinosaurs (thanks Pee Wee!), the most amazingly vibrant double rainbow I have ever seen, an INCREDIBLE lightening storm and a monsoon-style rain storm.  We arrived in downtown Phoenix just in time to catch the last half of the US vs. Mexico in the World Baseball Classic.

Then on Saturday and Sunday, we hit up 3 more games.  The Dodgers picked up 2 more wins as did the US in their game against Italy.  Besides all of the baseball though, one of the highlights was our night out on Sunday when we took a breather from games and had a date night.  About a mile from our hotel, we found a great barbecue joint, Bobby Q’s, which happened to be rated EXTREMELY well on Yelp (seriously, what did people do before Yelp?!).

IMG_2374

I was pleasantly surprised when we arrived at how amazing the place looked.  In LA, you don’t see a whole lot of brick, let alone the real stuff that would immediately collapse mid-earthquake.  This place appeared to be built entirely out of the stuff.

IMG_2376

From the outside patio, through the lobby and in to the restaurant was this great combination of rustic, industrial and Southern charm.

IMG_2384

It was this incredible mix of repurposed architectural features and flea market/vintage finds.

IMG_2377

IMG_2380

(that’s a painting of a giant cowboy on the wall)

And the ceilings were made of these amazing pieces of wide-planked reclaimed wood.

IMG_2378

As for the food, we were thoroughly pleased.  They boast authentic St. Louis style ribs which we had to try.  They were delicious– finger-licking good even, along with the side of grilled veggies and some amazing cornbread; you can never go wrong with corn bread.  Our one gripe, however, was the mac and cheese, which we tried based on many positive Yelp reviews.  Well it turns out that Jefe and I are mac and cheese snobs.  We’ve had our fair share recently at numerous “new” American style restaurants in LA and we’ve become connoisseurs of sorts.  Well, Bobby Q’s, we could taste Velveeta.  If you’ve never had true, honest to God, made-from-scratch mac and cheese, I could see why one might think it’s amazing.  It was creamy.  But the taste just wasn’t quite right.  If I’m paying more than $5 for mac and cheese, I except something other than what possibly had Kraft on the label 20 minutes ago.

Anyways, overall we were pretty pleased.  And the drinks (mine of course was served in the all-too-trendy mason jar) potent and quite tasty.

IMG_2385

We finished up our date night with a late showing of “Oz, the Great and Powerful.”  As a truly die-hard Wizard of Oz fan (and someone who is well too aware of how much Hollywood can screw up a great story), I was thoroughly impressed.  Highly recommended viewing even for the most devout of fans.

By Monday, Jefe and I were forced to get back on the road.  Luckily we didn’t run in to any monsoons or bolts of lightening, but we did get some amazing views of the desert.

IMG_2398

Oh vacation, you were way too short.

Jefe & Sledge