Last week I gave you a little preview of our office and today I’d thought I’d share the full plan and a little DIY!
For starters, gaining this space when we moved was a huge stress reliever. Jefe works from home a fair amount so he needs a quiet space to take those 6am calls with his East Coast colleagues. Our last place, although it boasted an open floor plan, left a lot to be desired if you needed your own, private space. It made Jefe’s working from home and my keeping up with yoga near impossible because let’s be honest – I love him, but I’d rather he not stare when I’m going from downward dog into ANY other pose.
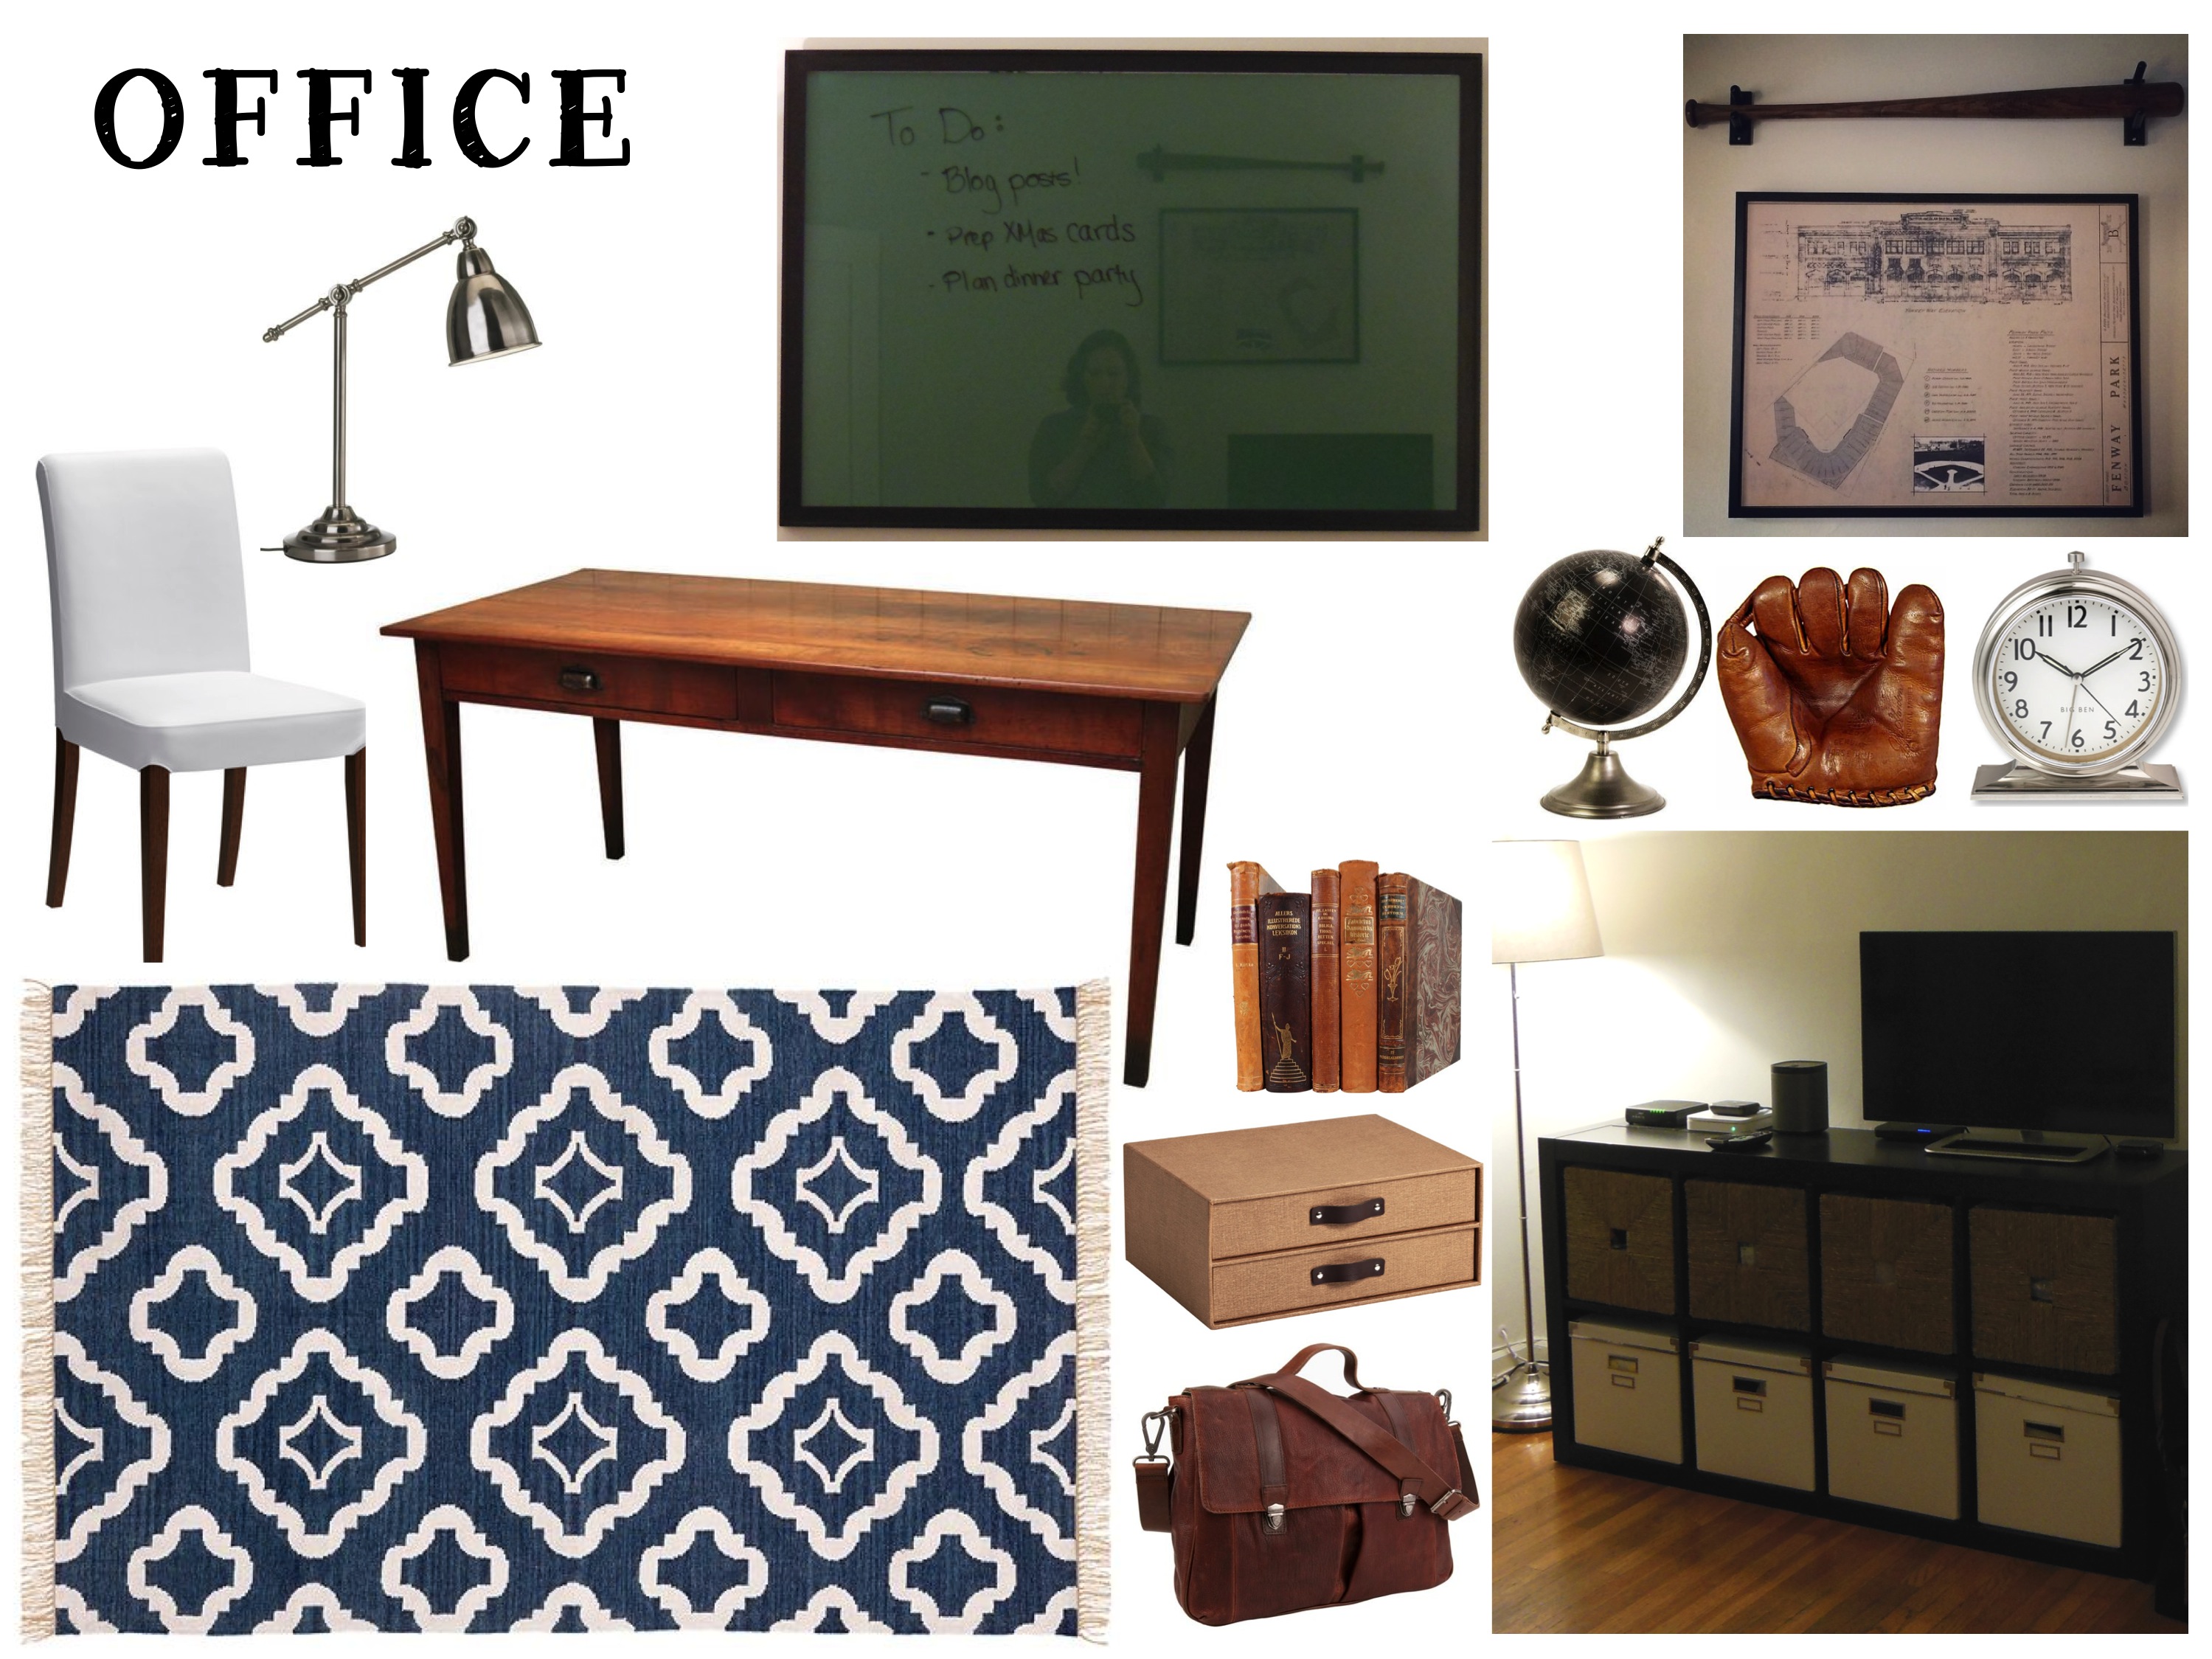
So – new room means new space to decorate. As the space will primarily be for him despite my push to make it a craft room, I decided to focus the design around the few items he’s already got that he wants displayed… and I’d prefer they’re not sitting in our living room. So thanks to shelves and shelves of bobbleheads and mini helmets, I’m aiming for an old world study with splashes of vintage sports paraphernalia.
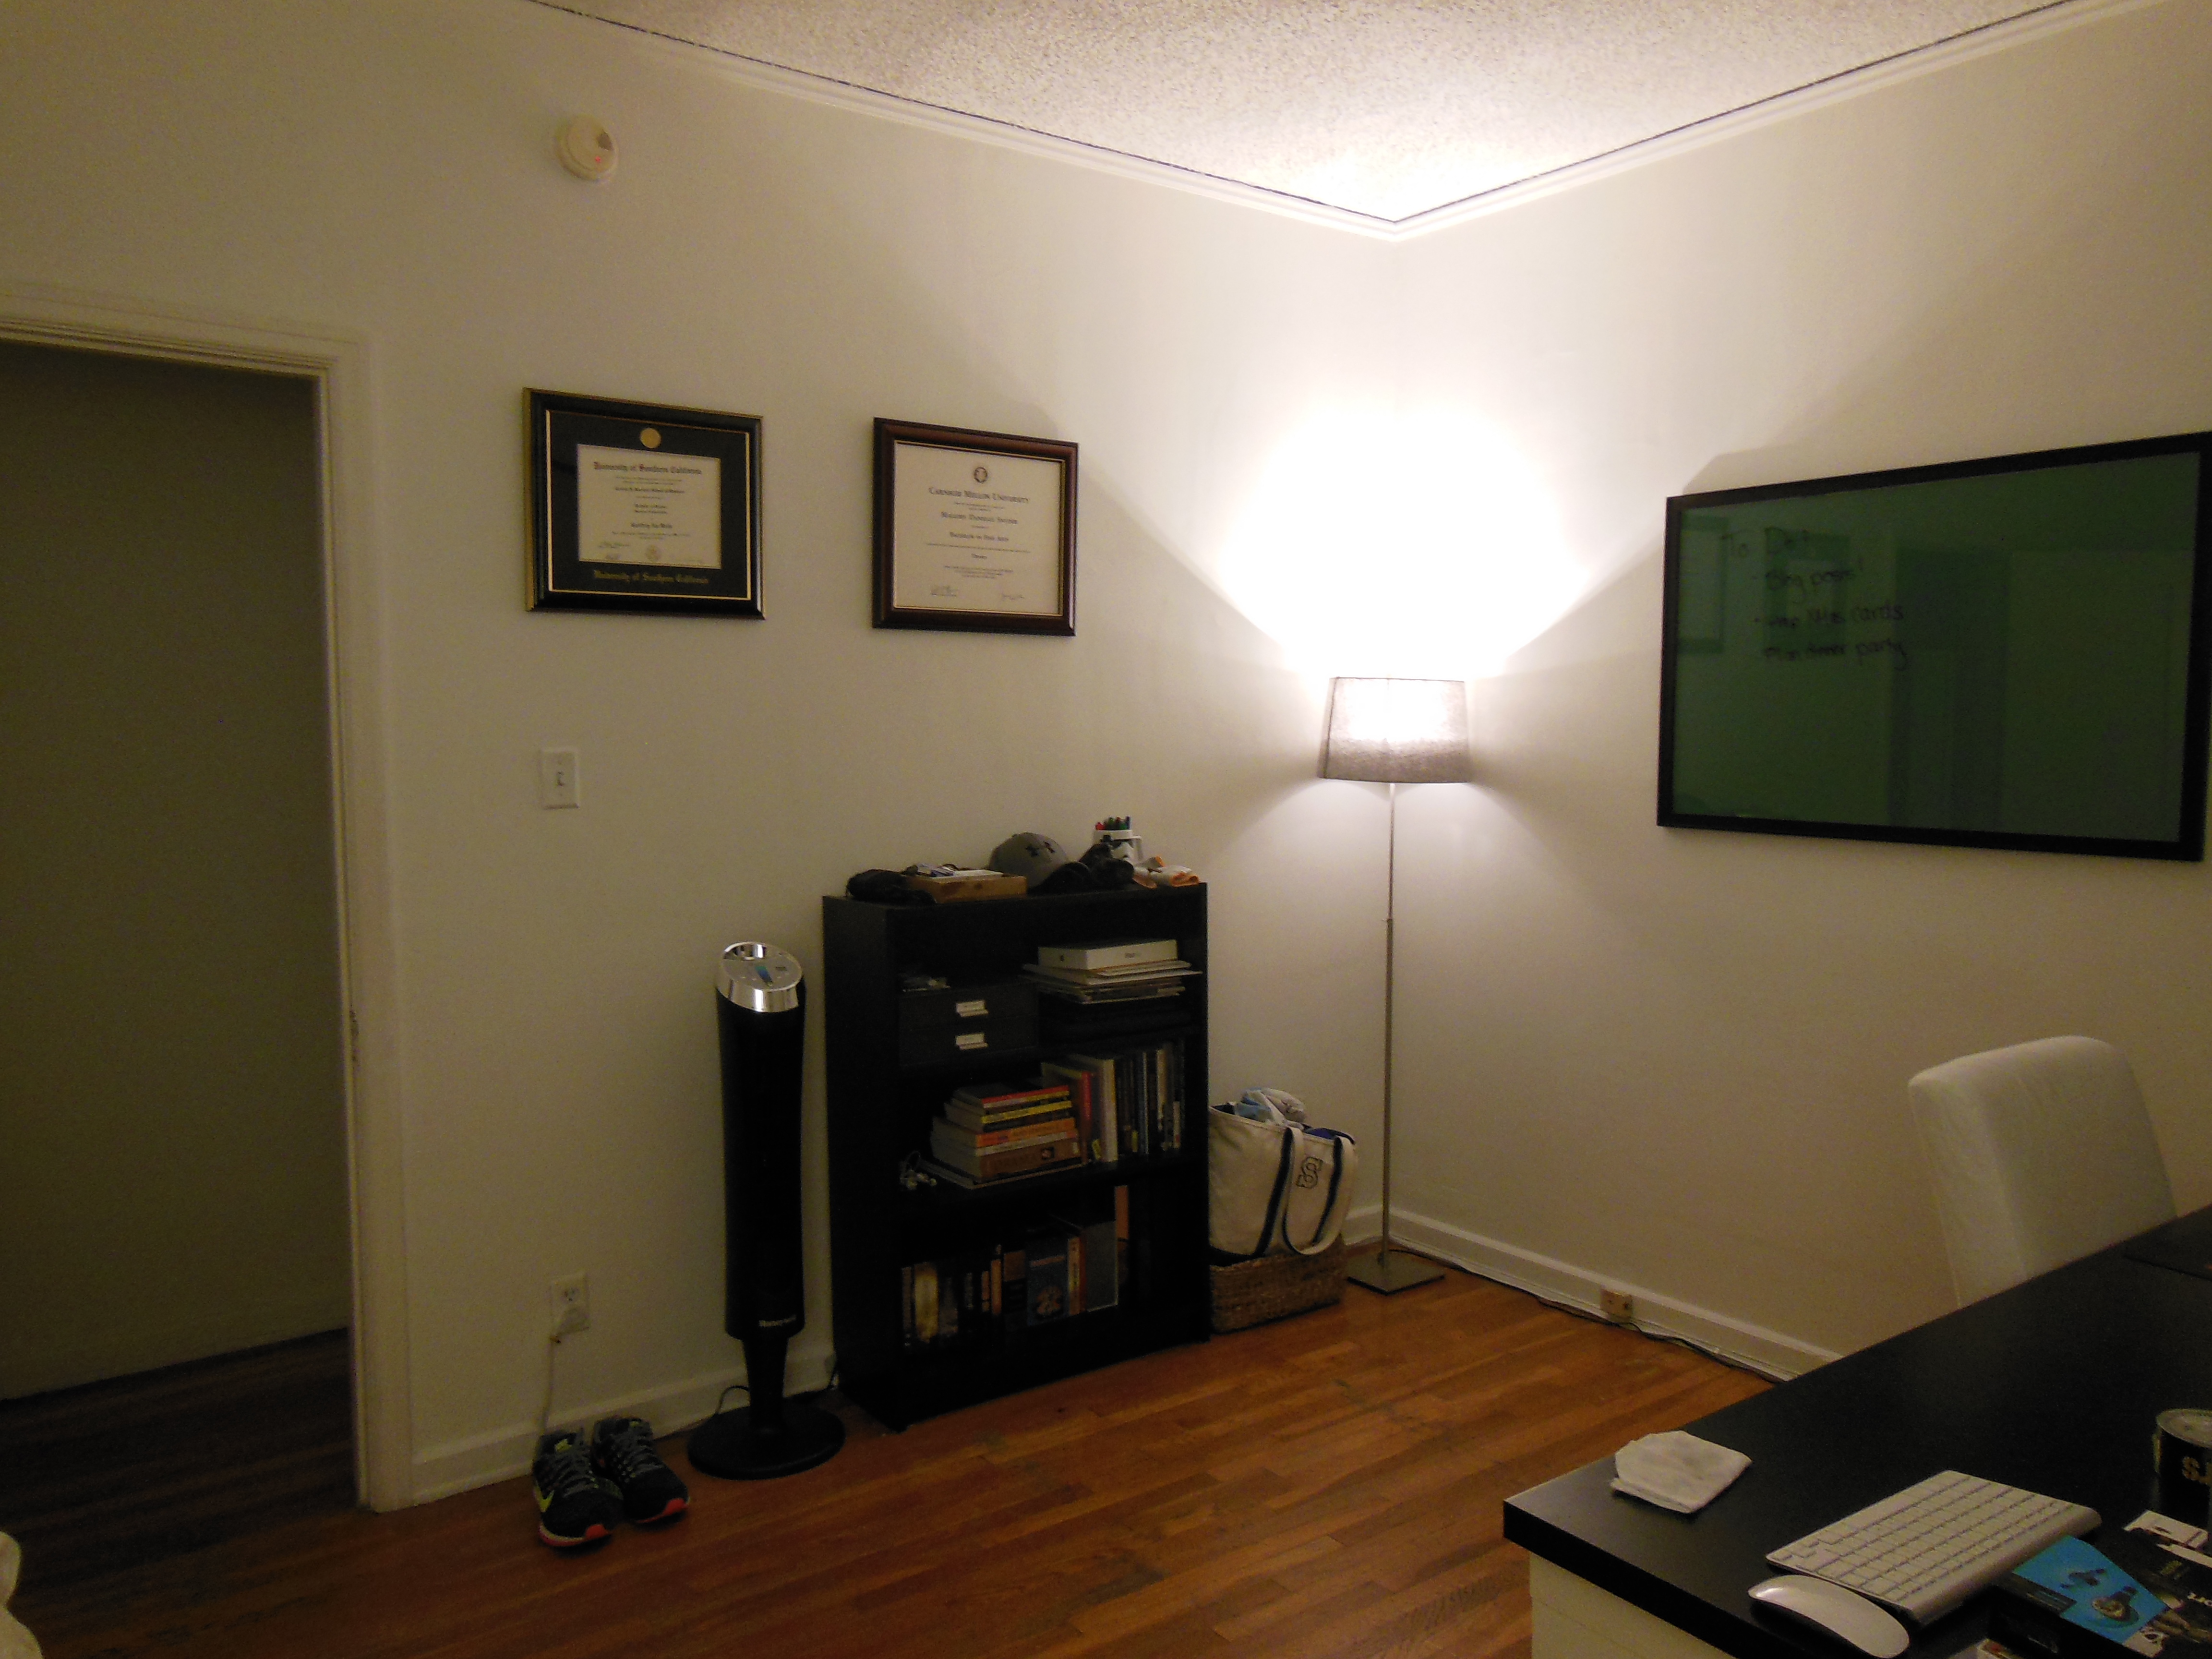
The room is still a serious work in progress, but here’s where we stand:


And where I hope to be:
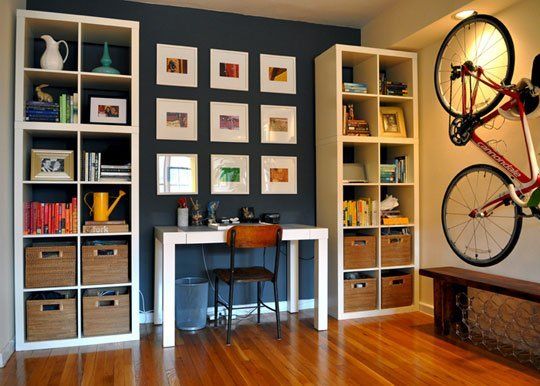
Last weekend we picked up a Kallax at Ikea to replace that sad and lonely bookshelf along the wall with our diplomas. It will give us space to finally set up our scanner, spread out our books (pulling a few from the full shelves in the living room) and accessorize a bit. Hoping to have that built before Jefe gets home from a work trip on Friday!
While flea marketing a few weeks ago, Jefe also mentioned he’d be open to a new desk so I’ve got my eye on a few contenders; I’d still like something large enough that we each can have our own area, so I’m thinking an old dining table. It will give a vintage feel while still providing a long, open workspace.
The rest of the mood board is fairly self-explanatory (and I’m getting a little wordy), so time for the promised DIY!
When we first moved and established this as the office, Jefe mentioned getting a dry erase board. But why buy a boring, sterile looking thing from Office Depot when I can whip one up in a flash? I saw this and knew it’d be a cinch….
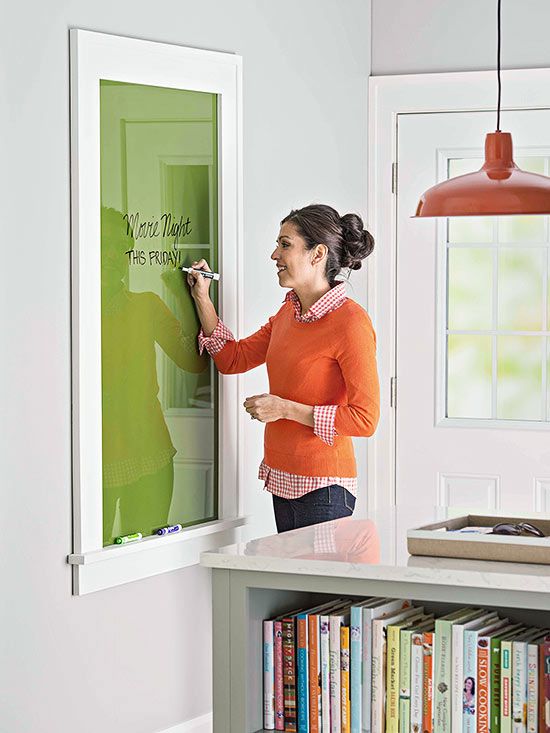
Famous last words. I knew you could use dry erase markers on glass, so I immediately thought of just buying a huge frame with an edge we liked. Then I’d slip some paper or fabric behind the glass to give it some added character.
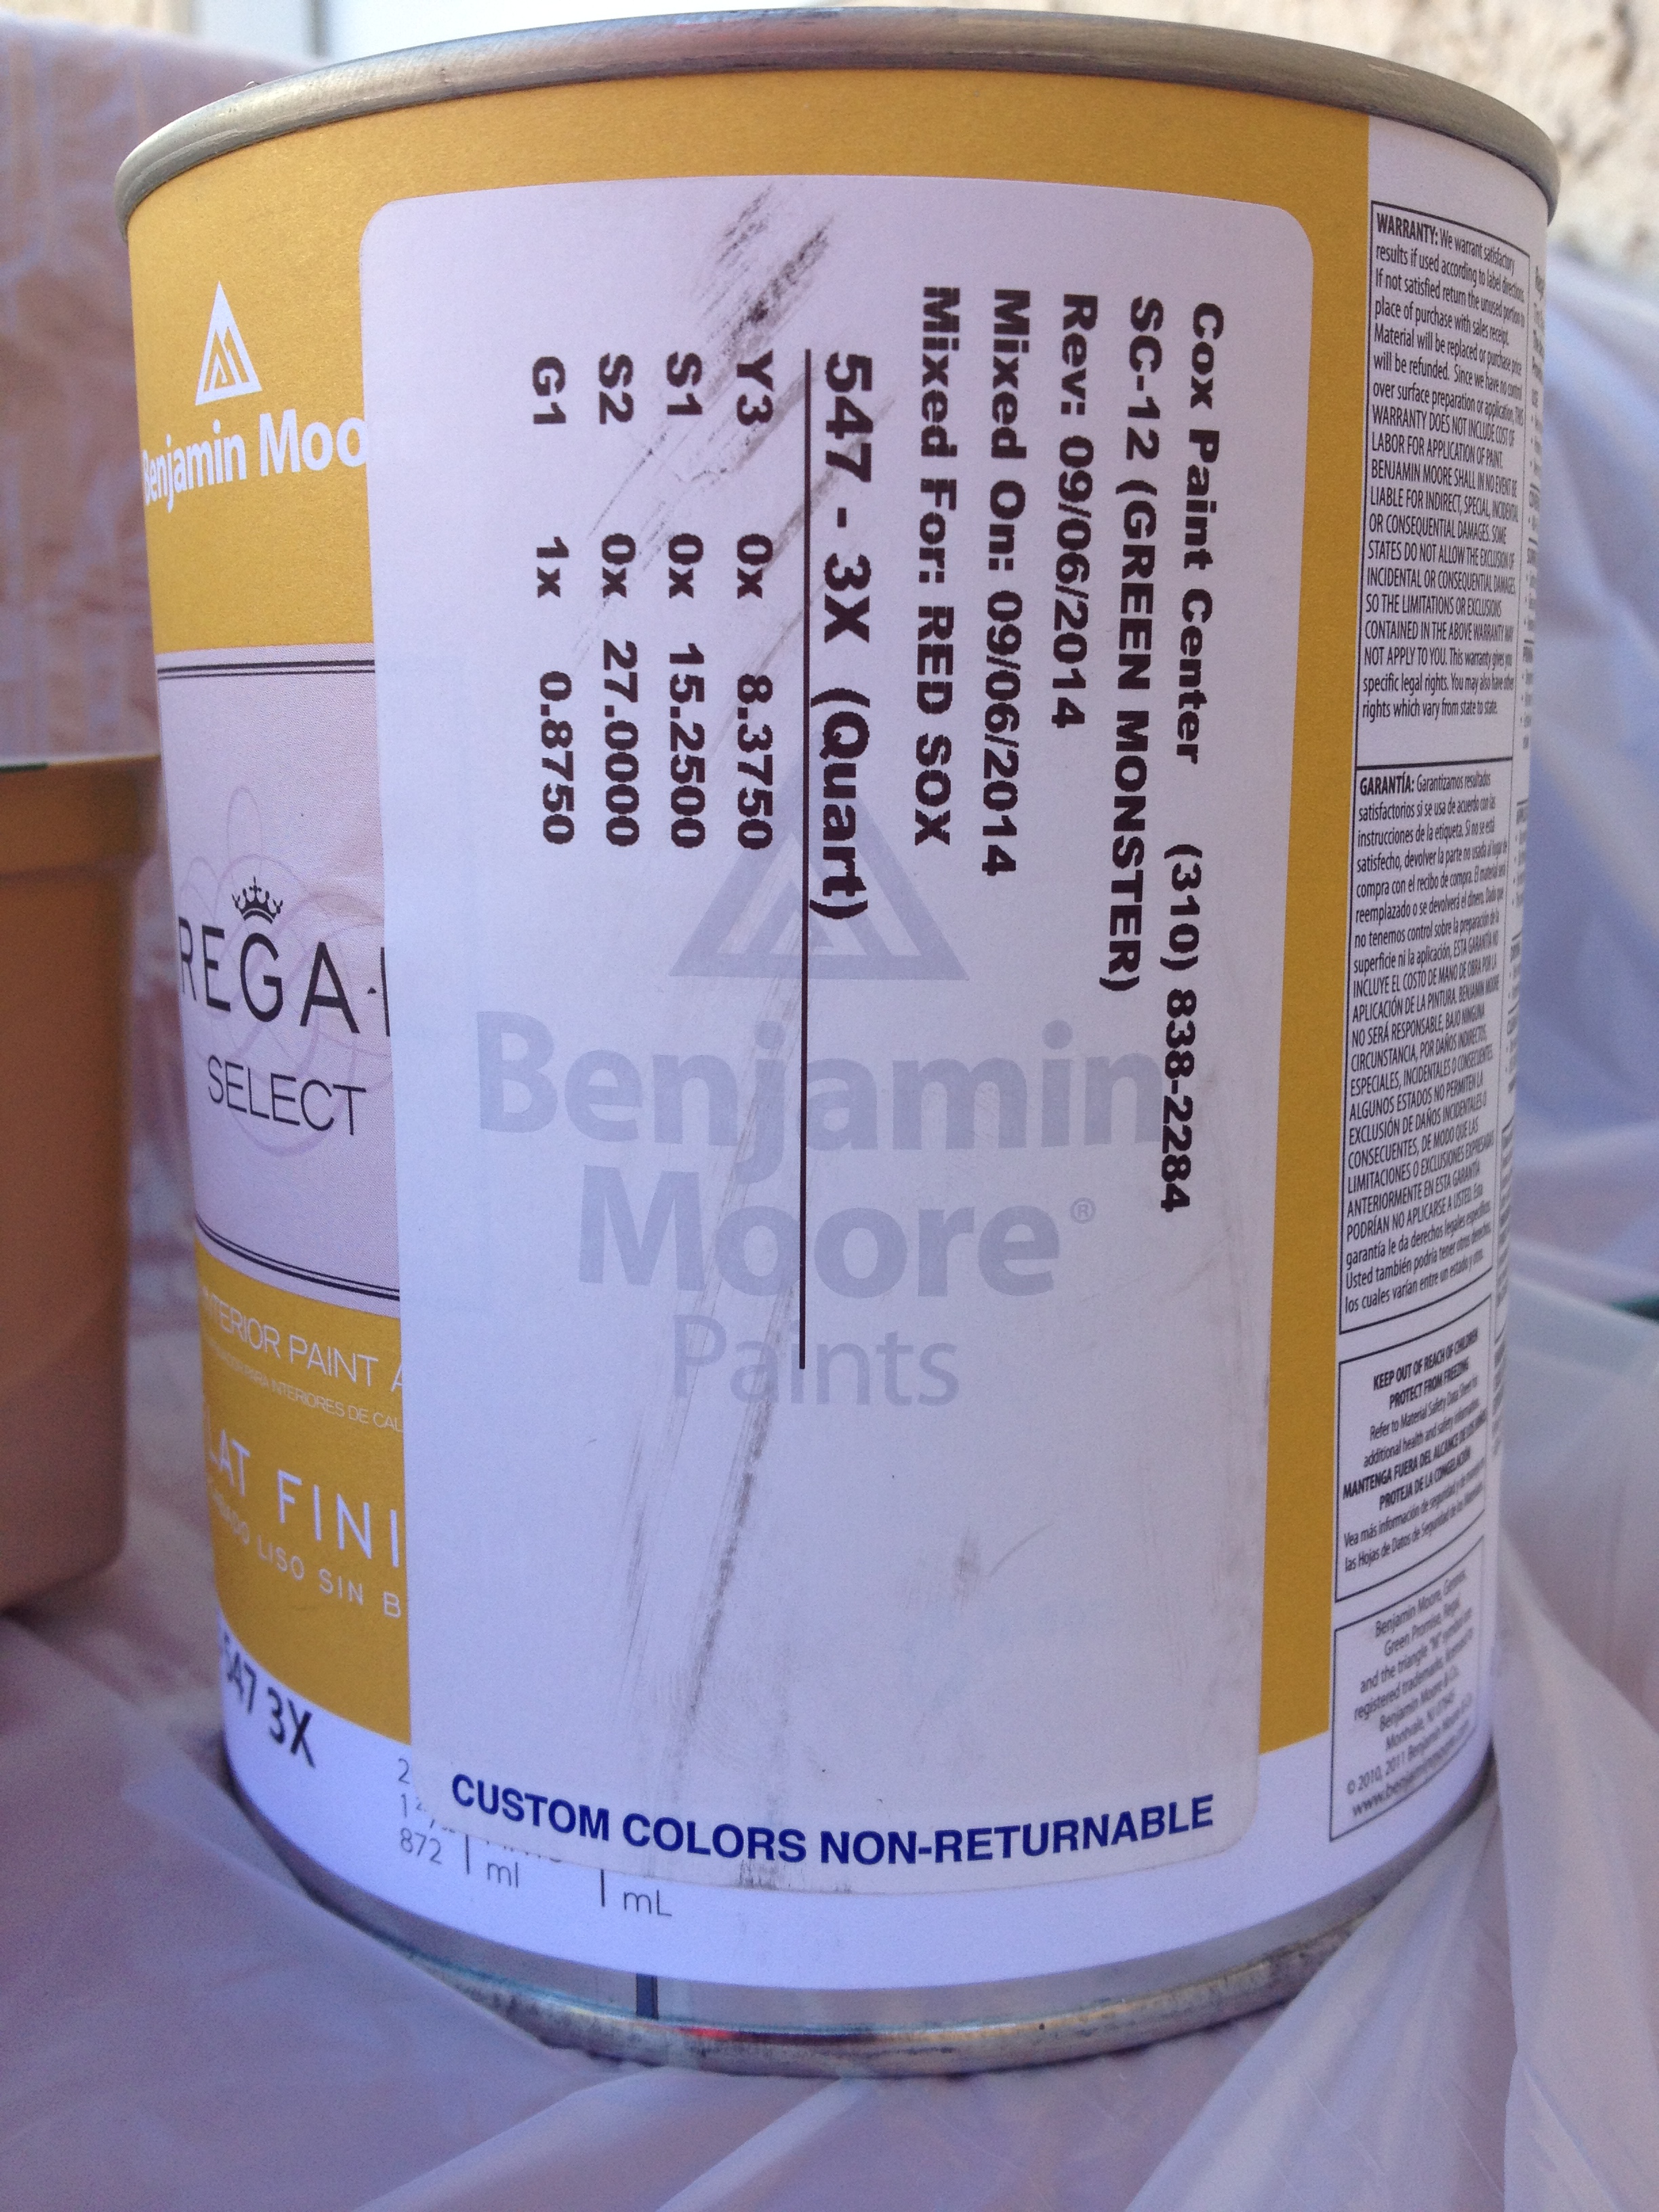
Flash forward to his birthday, I got the genius idea to paint behind the glass with Benjamin Moore’s new Fenway Collection. Nothing but Green Monster Green for my Jefe. Well, apparently they don’t sell a New England baseball team inspired paint collection west of the Mississippi. So after many phone calls to 20+ paint stores, I found one that called BMoore’s headquarters, got the color formula, and custom created it for me. For those that would love to avoid this hassle, here’s the color formula:

The rest was, in fact, fairly easy. I picked up some matte board that had a bit of texture to it and just slapped a few even coats of the paint on it. I could have painted directly on the back side of the glass, but wanted the option to be able to swap it out if Jefe ever got tired of the green.
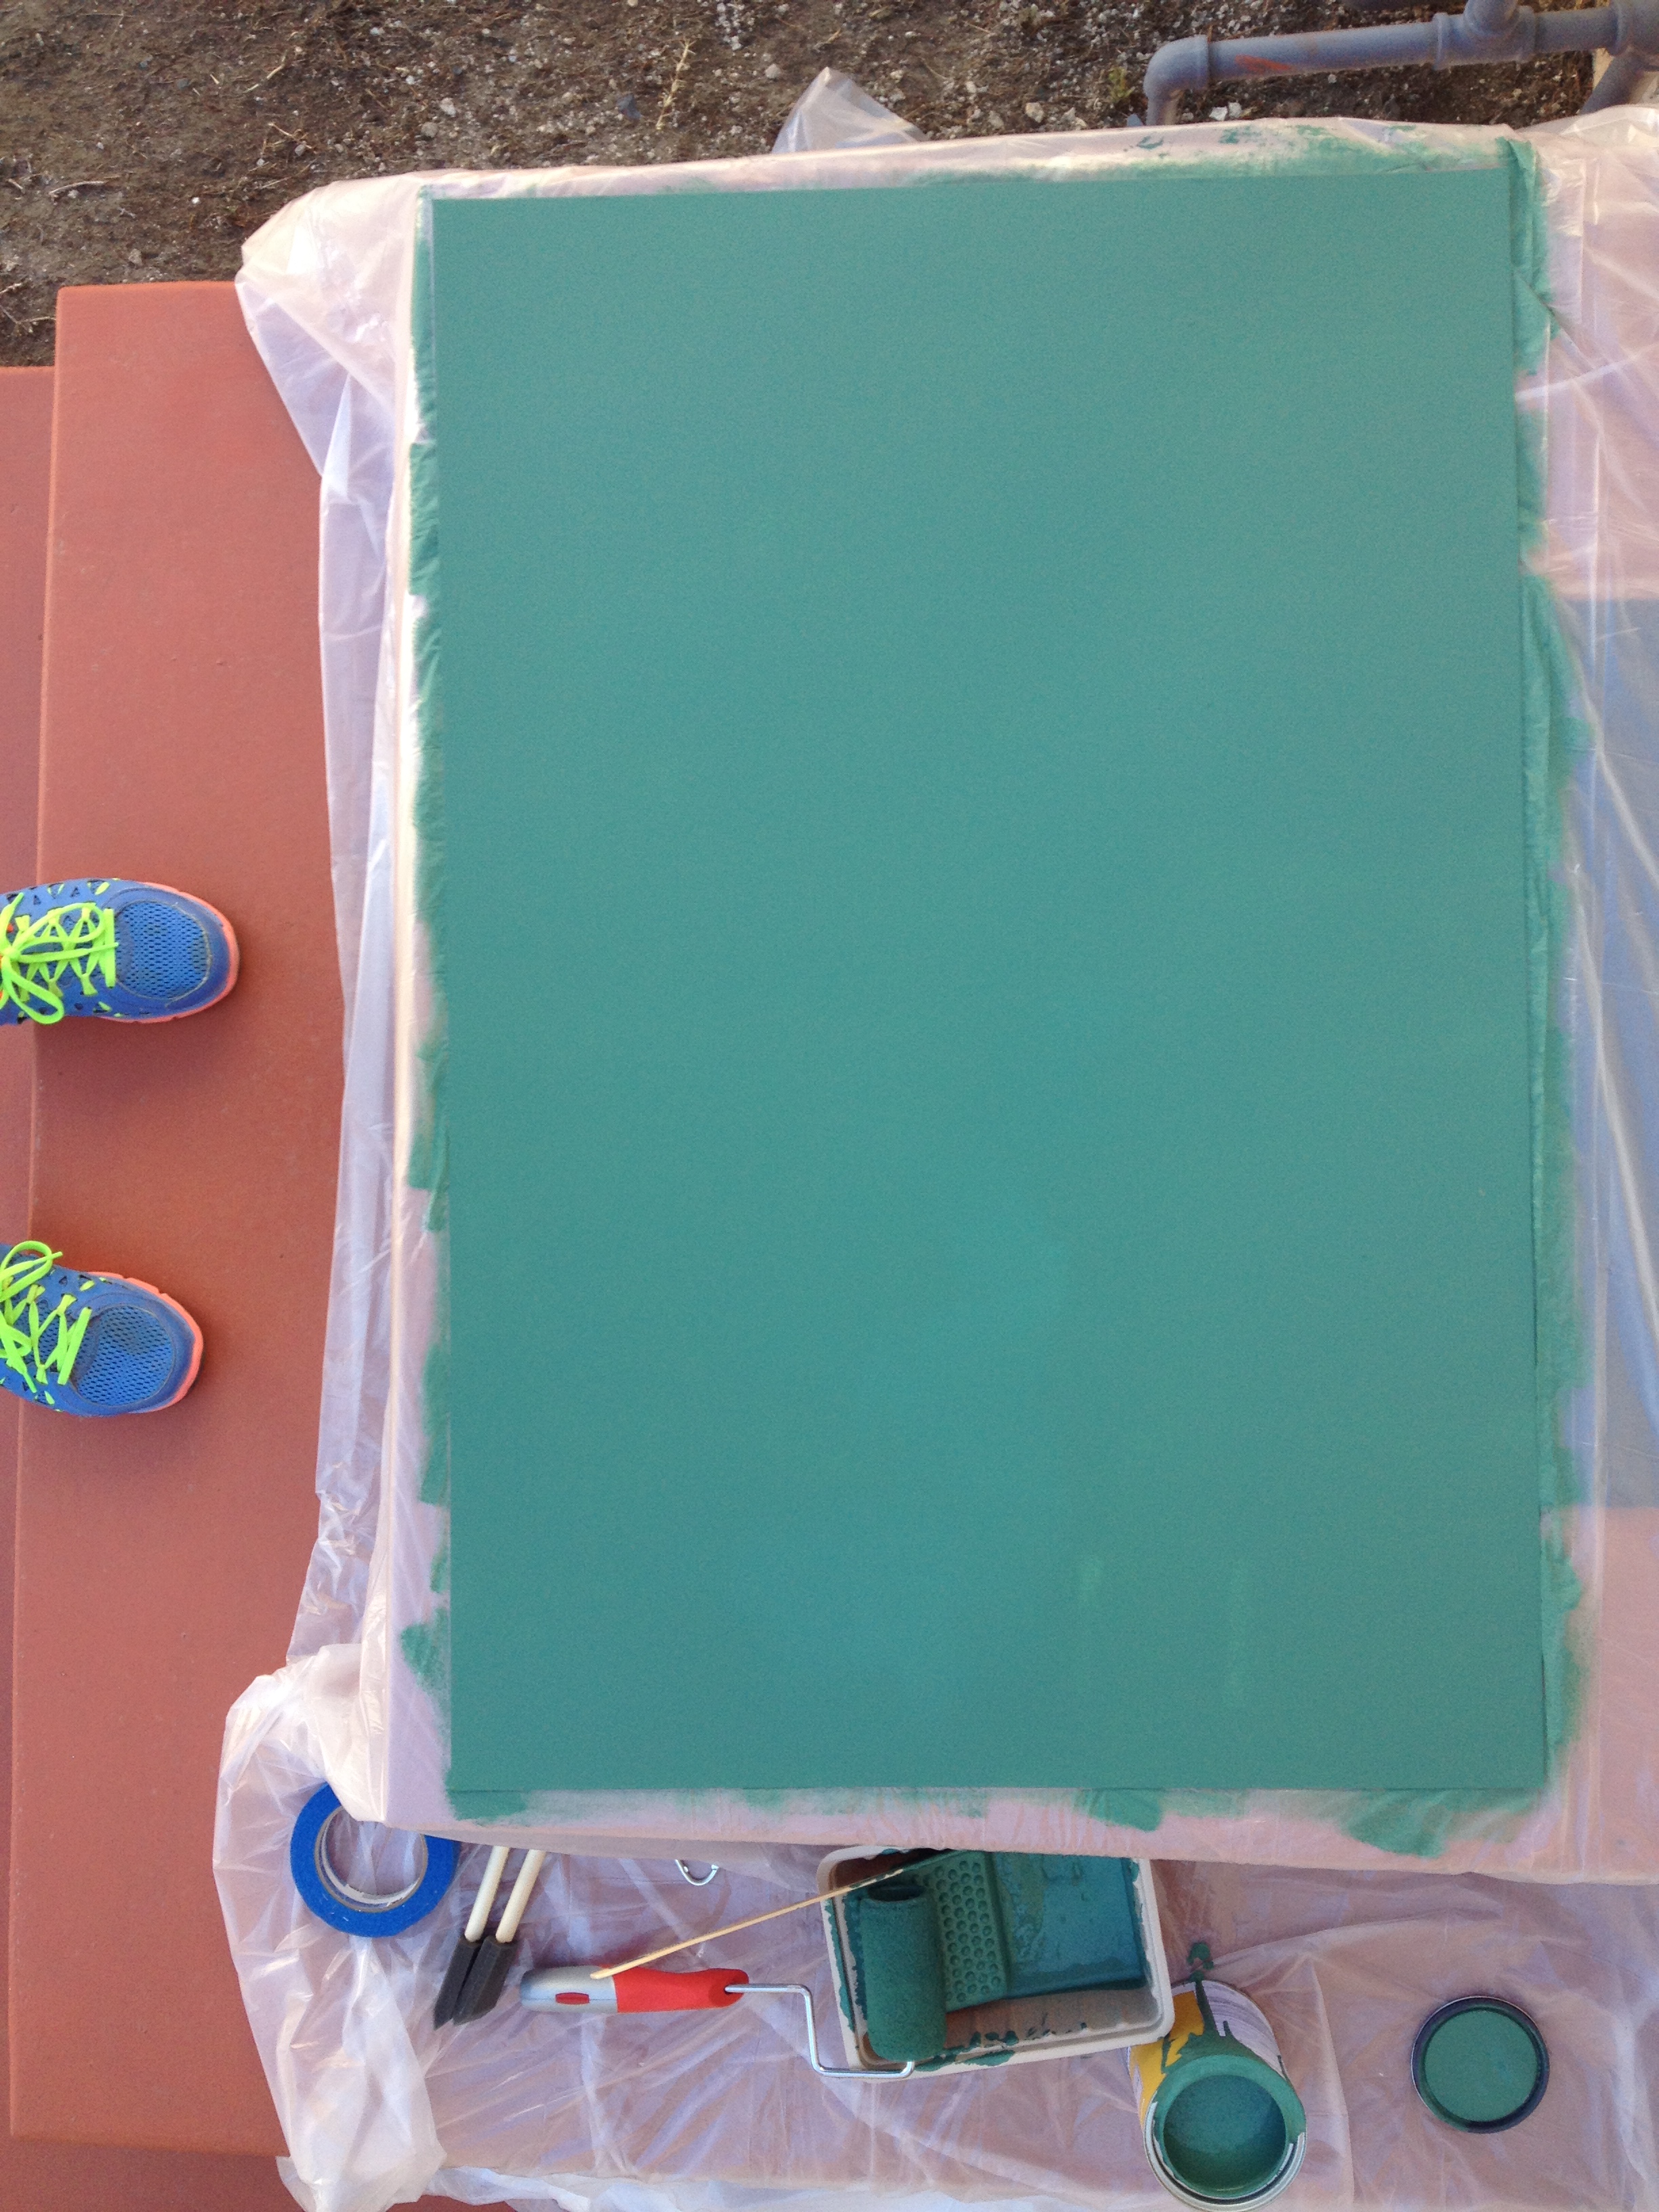

Once dry, I slipped the matte board inside the frame and voila! Instant, custom dry erase board.

I considered painting “Fenway Park” in white like it is on the scoreboard of the ACTUAL Green Monster, but second guessed myself. Luckily, Jefe likes it better this way and we can always add it later if he changes his mind.

And for those still reading, I have some exciting news! Jefe has taken it upon himself to prep a blog post for you guys! Can’t wait to share it with you all in the coming weeks!